


SwiftUIでカラーピッカーを作るという連載記事です。今回はカラーピッカーのグラデーションビュー上をタップして、RGB値を設定できるようにするためのコードを実装します。
This is a series of articles on creating a color picker in SwiftUI. In this article, we aim to implement the code that enables tapping on the gradient view of the color picker to set RGB values.
To support tap gestures in SwiftUI
To support tap gestures in SwiftUI, use the onTapGesture modifier. The behavior of the onTapGesture modifier varies based on different arguments. In addition, iOS 16, iPadOS 16, macOS 13, and watchOS 9.0 have added a modifier that passes the tapped coordinates.
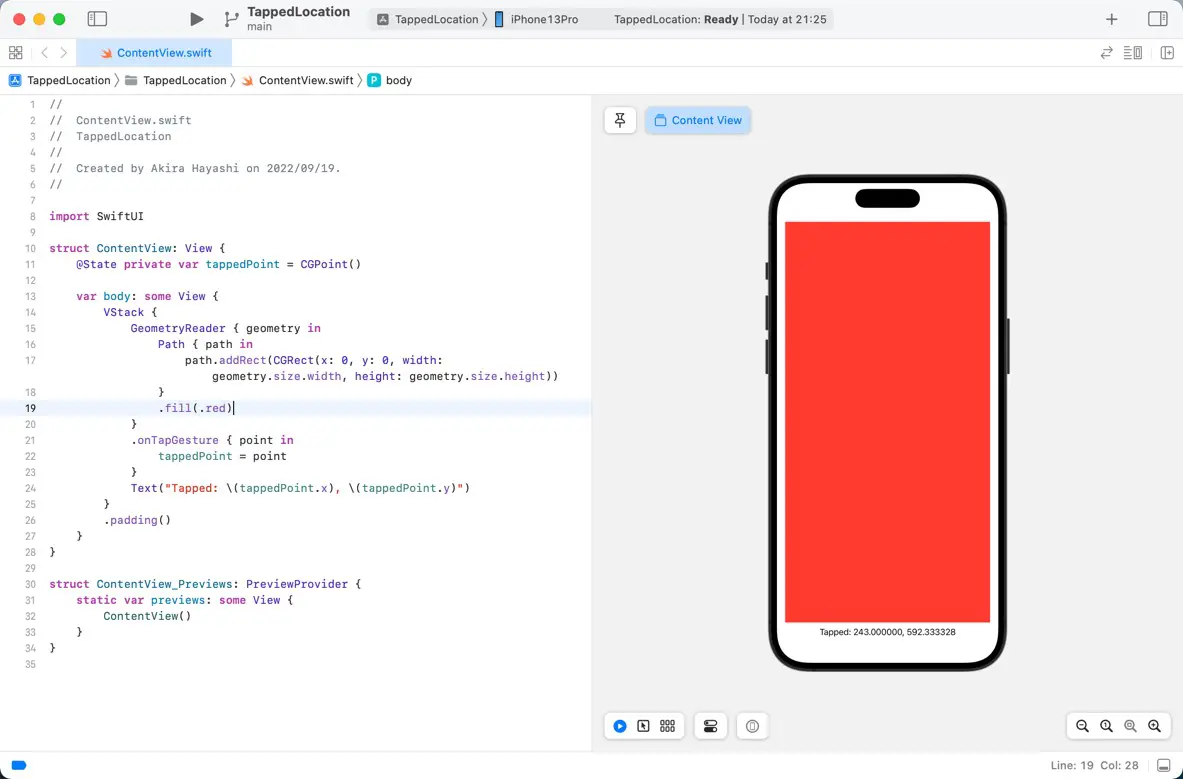
For instance, the subsequent code illustrates how to display the tapped coordinates on a label in the red view.
struct ContentView: View {
    @State private var tappedPoint = CGPoint()

    var body: some View {
        VStack {
            GeometryReader { geometry in
                Path { path in
                    path.addRect(CGRect(x: 0, y: 0, width: geometry.size.width, height: geometry.size.height))
                }
                .fill(.red)
            }
            .onTapGesture { point in
                tappedPoint = point
            }
            Text("Tapped: \(tappedPoint.x), \(tappedPoint.y)")
        }
        .padding()
    }
}
Calculate the current value from the coordinates
We will now formulate the code to calculate the current value based on the coordinates. For example, suppose the left edge of the PickerGradationView is 0.0, and the right edge is 1.0, so dividing the X coordinate of the tapped coordinate by the width of the PickerGradationView will give the current value of the channel as it is.
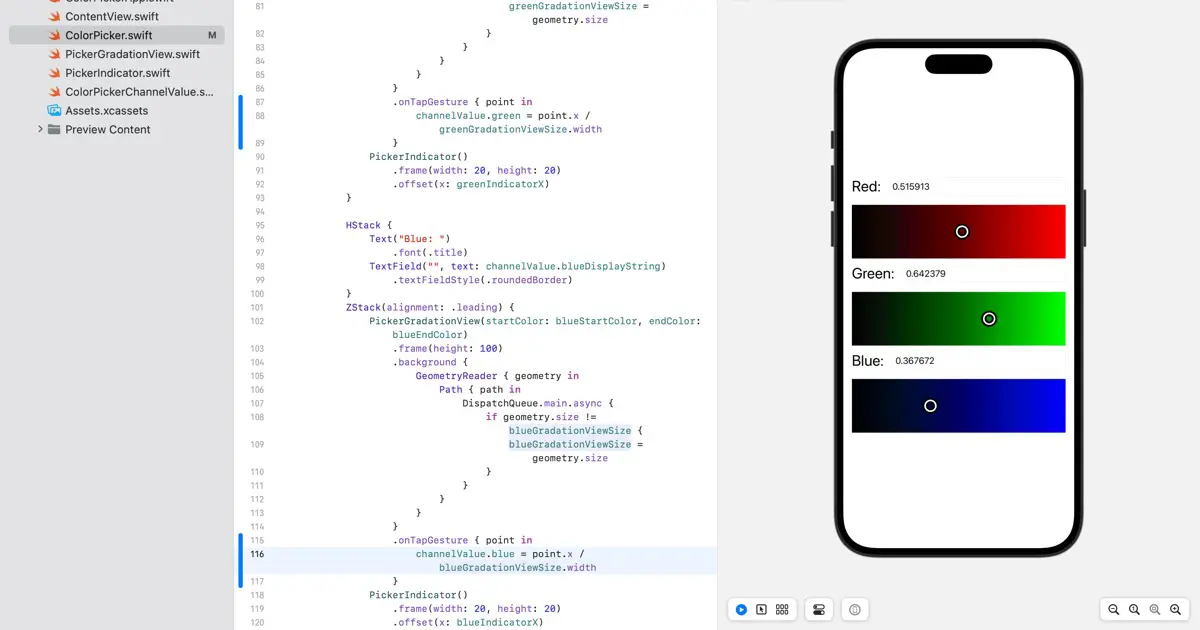
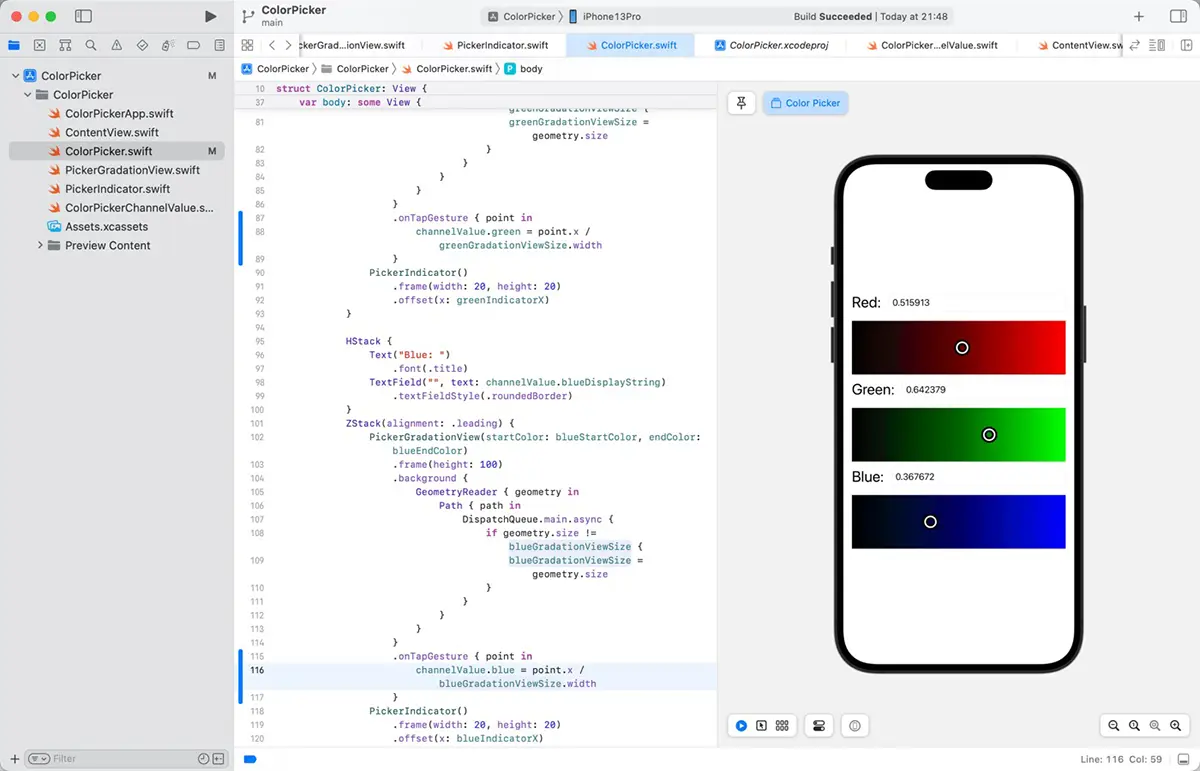
The code for the Red channel is as follows.
PickerGradationView(startColor: redStartColor, endColor: redEndColor)
	.frame(height: 100)
	.background {
		GeometryReader { geometry in
			Path { path in
				DispatchQueue.main.async {
					if geometry.size != redGradationViewSize {
						redGradationViewSize = geometry.size
					}
				}
			}
		}
	}
	.onTapGesture { point in
		channelValue.red = point.x / redGradationViewSize.width
	}
We have incorporated the onTapGesture modifier, and the same code will apply to the Green and Blue channels.
Download the sample code
You can download the code crafted for this article here.


