


This series of articles resolves around creating a color picker in SwiftUI. Initially, I envisioned the code to be on a smaller scale and, thus, added code with minimal organization. However, this approach led to a convoluted codebase. So in this article, I would like to organize the code.
Model for a channel
The color picker we created in this series is an RGB model with three channels.
- Red
- Green
- Blue
The information that each channel has can be organized as follows.
- Channel name
- Current value
- The text of the current value field
The following information is also needed to handle the drawing and tapping of gradient views for each channel.
- The view size of the gradient view
- Start color of the gradient (Left edge color)
- End color of the gradient (Right edge color)
With these considerations in mind, we proceed to create model classes.
ColorPickerChannelModelColorPickerGradationModel
Implement the ColorPickerChannelModel class
Let’s now implement the ColorPickerChannelModel class.
The currentValue has a fixed range of possible values. However, if a value is about to be set outside the range, we want to round it to the range, so we have implemented the following.
- In addition to the property, implement the
changeCurrentValuemethod to check for out-of-range and rounding. - Use the
changeCurrentValuemethod for out-of-range checking.
The implemented code is as follows.
import SwiftUI

class ColorPickerChannelModel : ObservableObject {
    /// Channel name
    @Published var channelName: String

    /// Current value
    @Published var currentValue: Double = 0.0

    init(channelName: String) {
        self.channelName = channelName
    }

    /// Text being entered
    private var fieldTextStore: String?

    /// Binding of the text being entered
    var fieldText: Binding<String> {
        Binding {
            self.fieldTextStore ?? String(format: "%.1f", self.currentValue)
        } set: {
            self.fieldTextStore = $0
            if let value = Double($0) {
                self.changeCurrentValue(value)
            }
        }

    }

    /// Update the current value
    func changeCurrentValue(_ value: Double) {
        if value < 0.0 {
            currentValue = 0.0
        } else if value > 1.0 {
            currentValue = 1.0
        } else {
            currentValue = value
        }
    }

    /// Clear text being entered
    func clearFieldText() {
        fieldTextStore = nil
    }
}
Implement the ColorPickerGradationModel class
Make the model class capable of holding view size and gradient color by properties. Then, implement it simply with stored properties.
Also, each channel has a different color. Still, we want to make it easy to use, so we create a static property that retrieves an instance with information on the Red, Green, and Blue channels.
The implemented code is as follows.
import SwiftUI

class ColorPickerGradationModel : ObservableObject {
    /// Size of the gradient view
    @Published var viewSize: CGSize = CGSize()
    /// Start color of the gradient
    @Published var startColor: Color
    /// End color of the gradient
    @Published var endColor: Color

    /// Initializer
    /// - Parameters:
    ///     - startColor: The start color of the gradient
    ///     - endColor: The end color of the gradient
    init(startColor: Color, endColor: Color) {
        self.startColor = startColor
        self.endColor = endColor
    }
}

extension ColorPickerGradationModel {

    /// Red channel of the RGB color model
    static var red: ColorPickerGradationModel {
        ColorPickerGradationModel(startColor: Color(red: 0.0, green: 0.0, blue: 0.0),
                                  endColor: Color(red: 1.0, green: 0.0, blue: 0.0))
    }

    /// Green channel of the RGB color model
    static var green: ColorPickerGradationModel {
        ColorPickerGradationModel(startColor: Color(red: 0.0, green: 0.0, blue: 0.0),
                                  endColor: Color(red: 0.0, green: 1.0, blue: 0.0))
    }

    /// Blue channel of the RGB color model
    static var blue: ColorPickerGradationModel {
        ColorPickerGradationModel(startColor: Color(red: 0.0, green: 0.0, blue: 0.0),
                                  endColor: Color(red: 0.0, green: 0.0, blue: 1.0))
    }
}
The gradient view
Previously, the ColorPicker was responsible for managing both the PickerGradationView and PickerIndicator and the information distributed across different models. This will be changed so that the PickerGradationView has and manages the PickerIndicator.
The model should be passed from the higher level.
The height of the view is also fixed in the PickerGradationView.
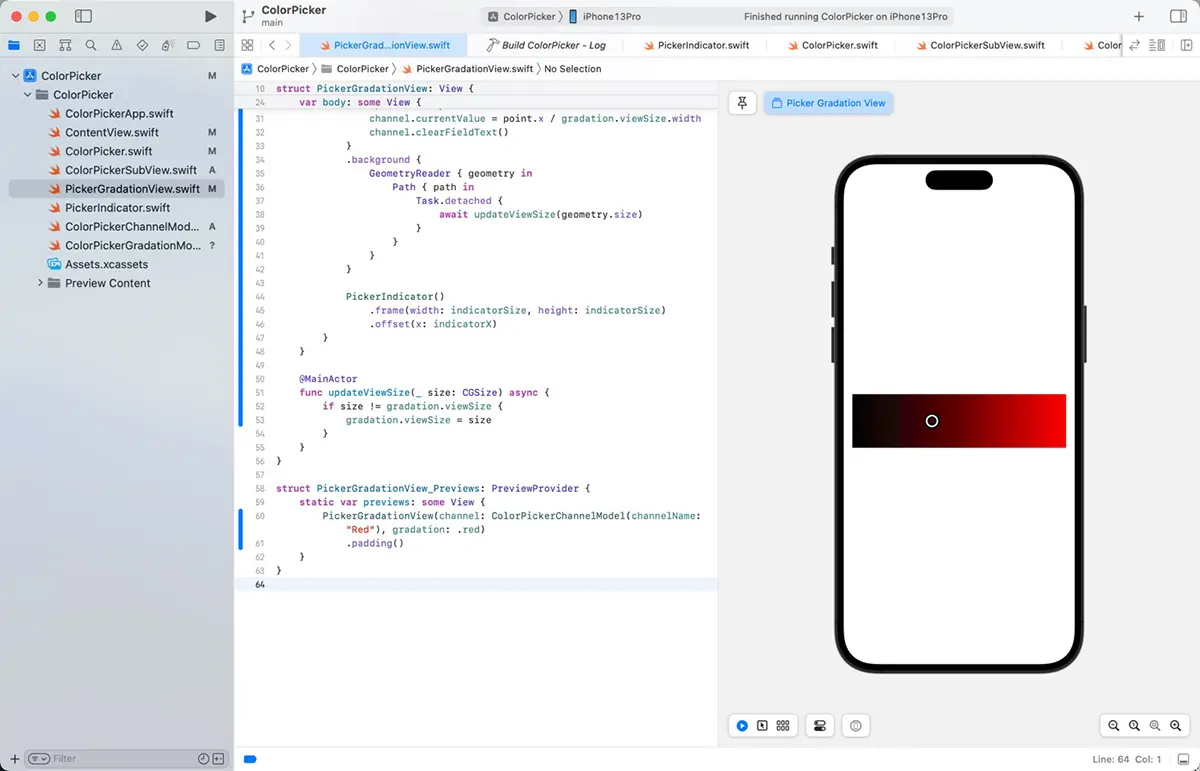
Implement the PickerGradationView
The implemented code is as follows.
import SwiftUI

struct PickerGradationView: View {
    @ObservedObject var channel: ColorPickerChannelModel
    @ObservedObject var gradation: ColorPickerGradationModel

    /// Size of the knob
    let indicatorSize: CGFloat = 20
    /// Height of the gradient view
    let gradationHeigh: CGFloat = 100

    /// X coordinates of the knob
    var indicatorX: CGFloat {
        gradation.viewSize.width * channel.currentValue - indicatorSize / 2
    }

    var body: some View {
        ZStack(alignment: .leading) {
            GeometryReader() { geometry in
                LinearGradient(gradient: Gradient(colors: [gradation.startColor, gradation.endColor]), startPoint: UnitPoint(x: 0, y: 0), endPoint: UnitPoint(x: 1, y: 0))
            }
            .frame(height: gradationHeigh)
            .background {
                GeometryReader { geometry in
                    Path { path in
                        Task.detached {
                            await updateViewSize(geometry.size)
                        }
                    }
                }
            }
            .onTapGesture { point in
                channel.currentValue = point.x / gradation.viewSize.width
                channel.clearFieldText()
            }

            PickerIndicator()
                .frame(width: indicatorSize, height: indicatorSize)
                .offset(x: indicatorX)
        }
    }

    @MainActor
    func updateViewSize(_ size: CGSize) async {
        if size != gradation.viewSize {
            gradation.viewSize = size
        }
    }
}

struct PickerGradationView_Previews: PreviewProvider {
    static var previews: some View {
        PickerGradationView(channel: ColorPickerChannelModel(channelName: "Red"), gradation: .red)
            .padding()
    }
}
Views for each channel
The color picker in the RGB color model has different values and display colors for each channel, but the structure of the view is the same. The ColorPicker view created labels for all channels in the previous implementation. This makes the code confusing so we will cut it to a view created for each channel.

This structure also presented problems and had to be changed later in the series.
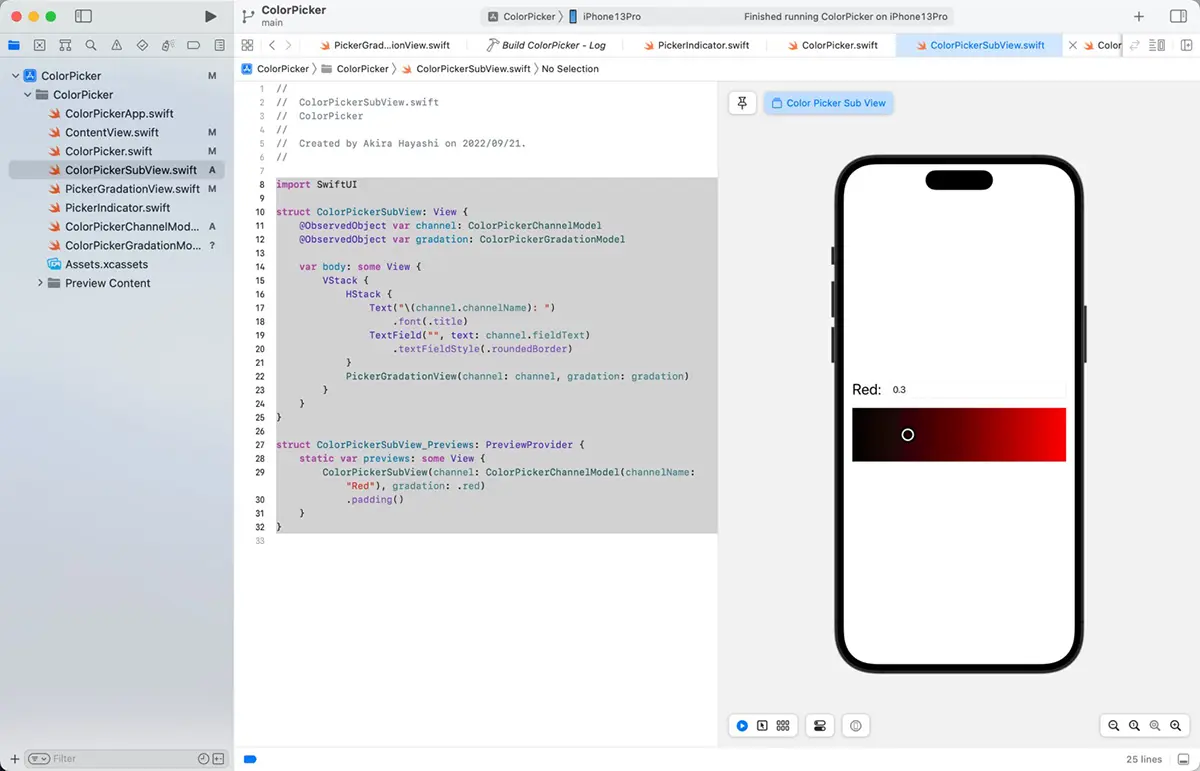
Implement the ColorPickerSubView
Create the following views for each channel.
PickerGradationView- Label for channel name
- Text field for editing the current value
The code would look something like this.
import SwiftUI

struct ColorPickerSubView: View {
    @ObservedObject var channel: ColorPickerChannelModel
    @ObservedObject var gradation: ColorPickerGradationModel

    var body: some View {
        VStack {
            HStack {
                Text("\(channel.channelName): ")
                    .font(.title)
                TextField("", text: channel.fieldText)
                    .textFieldStyle(.roundedBorder)
            }
            PickerGradationView(channel: channel, gradation: gradation)
        }
    }
}

struct ColorPickerSubView_Previews: PreviewProvider {
    static var previews: some View {
        ColorPickerSubView(channel: ColorPickerChannelModel(channelName: "Red"), gradation: .red)
            .padding()
    }
}
Color Picker for the RGB color model
We have implemented the views and the necessary models for each channel. The view and model implemented so far are combined to create a color picker for an RGB color model with three channels.
The previously implemented ColorPickerChannelValue.swift file is no longer needed and will be deleted.
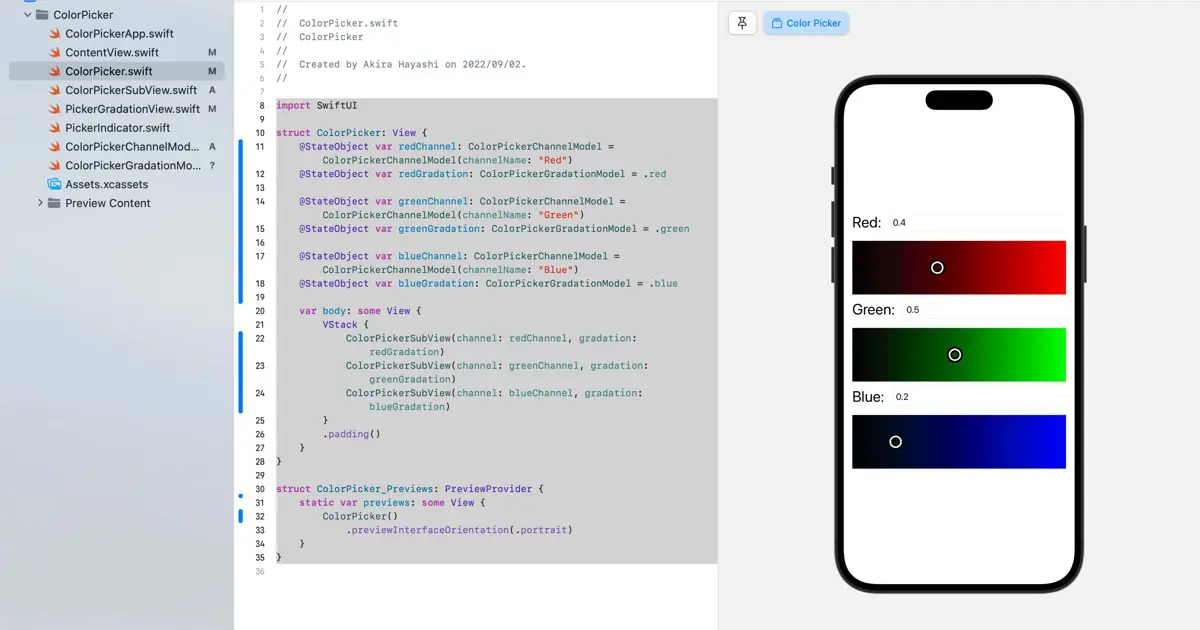
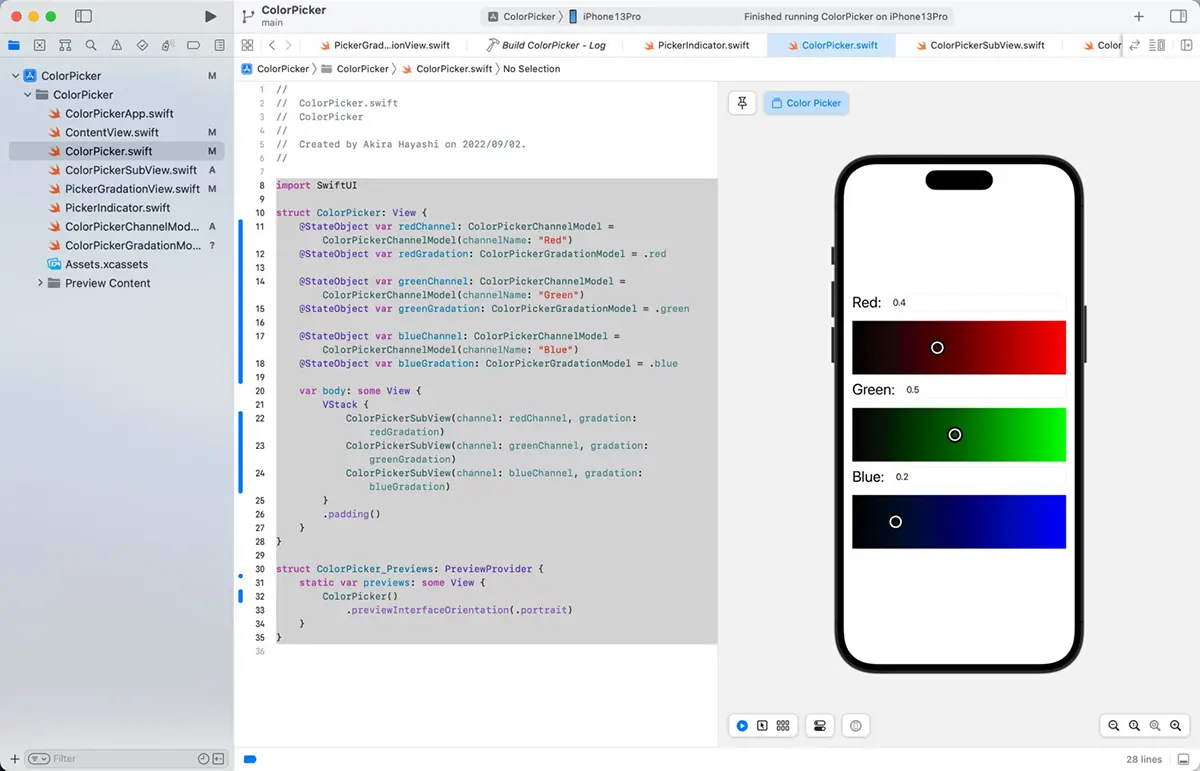
The code for ColorPicker.swift will also change significantly; it will be implemented using PickerGradationView, ColorPickerChannelModel, and ColorPickerGradationModel.
The code now looks like this.
import SwiftUI

struct ColorPicker: View {
    @StateObject var redChannel: ColorPickerChannelModel = ColorPickerChannelModel(channelName: "Red")
    @StateObject var redGradation: ColorPickerGradationModel = .red

    @StateObject var greenChannel: ColorPickerChannelModel = ColorPickerChannelModel(channelName: "Green")
    @StateObject var greenGradation: ColorPickerGradationModel = .green

    @StateObject var blueChannel: ColorPickerChannelModel = ColorPickerChannelModel(channelName: "Blue")
    @StateObject var blueGradation: ColorPickerGradationModel = .blue

    var body: some View {
        VStack {
            ColorPickerSubView(channel: redChannel, gradation: redGradation)
            ColorPickerSubView(channel: greenChannel, gradation: greenGradation)
            ColorPickerSubView(channel: blueChannel, gradation: blueGradation)
        }
        .padding()
    }
}

struct ColorPicker_Previews: PreviewProvider {
    static var previews: some View {
        ColorPicker()
            .previewInterfaceOrientation(.portrait)
    }
}
Conclusion
The code had a lot of nests with very poor visibility because everything was pushed into the ColorPicker, but after this reorganization, the code was divided into models and views. As a result, the nests have become shallower, making the code easier to read.
What is the best architecture to adopt for SwiftUI is often a topic of discussion on the Internet, and MVVM or TCA is often discussed for SwiftUI. After organizing this article, the code is based on MVVM, with the VM (View Model) removed. At this scale, View and Model are sufficient.
However, some say that ObservableObject is the View Model itself, and if you look at it that way, you could say that it has become MVVM.
Regardless, having a well-structured and readable code is more important than adhering to a specific architectural pattern.
Download the code
Click here to download the code created for this article.


