After setting up a GitLab account in Xcode, you can directly access GitLab repositories from Xcode.
This article explains how to set up a GitLab account in Xcode.
Generate a personal access token
To access GitLab from Xcode, you need a personal access token. Follow these steps to generate a personal access token.
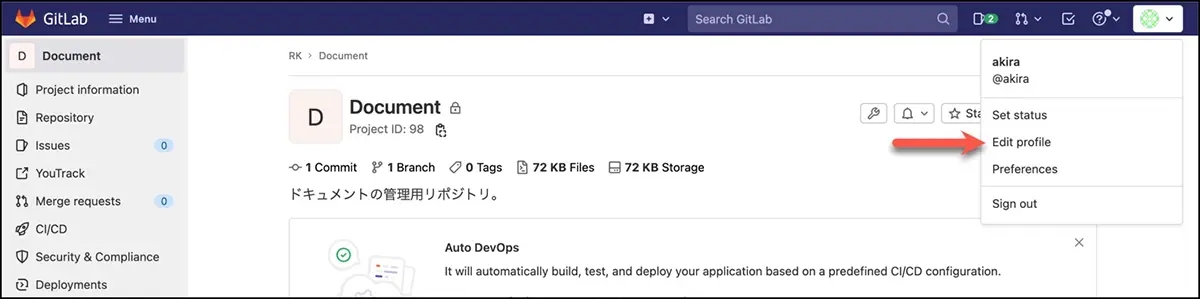
(1) Sign in to GitLab, click on your avatar icon in the upper right corner, and select “Edit Profile.
(2) Open “Access Tokens” in “User Settings”.
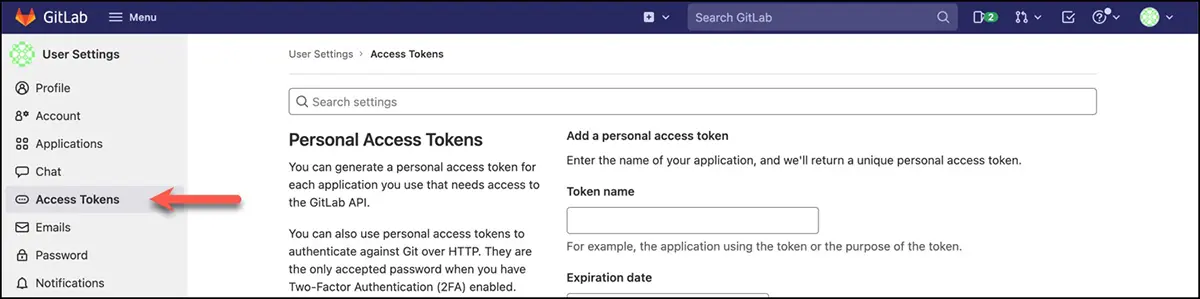
(3) Enter a name in the “Token name” field, such as “Xcode” that identifies the purpose of use.
(4) Enter the token’s expiration date in the “Expiration date” field.
By default, this field is left blank. If left blank, the expiration date will be indefinite.
(5) Set the permissions to be granted in the “Select scopes” section.
Set the permissions to be granted in the “Select scopes” section.
apiread_userread_apiread_repositorywrite_repository
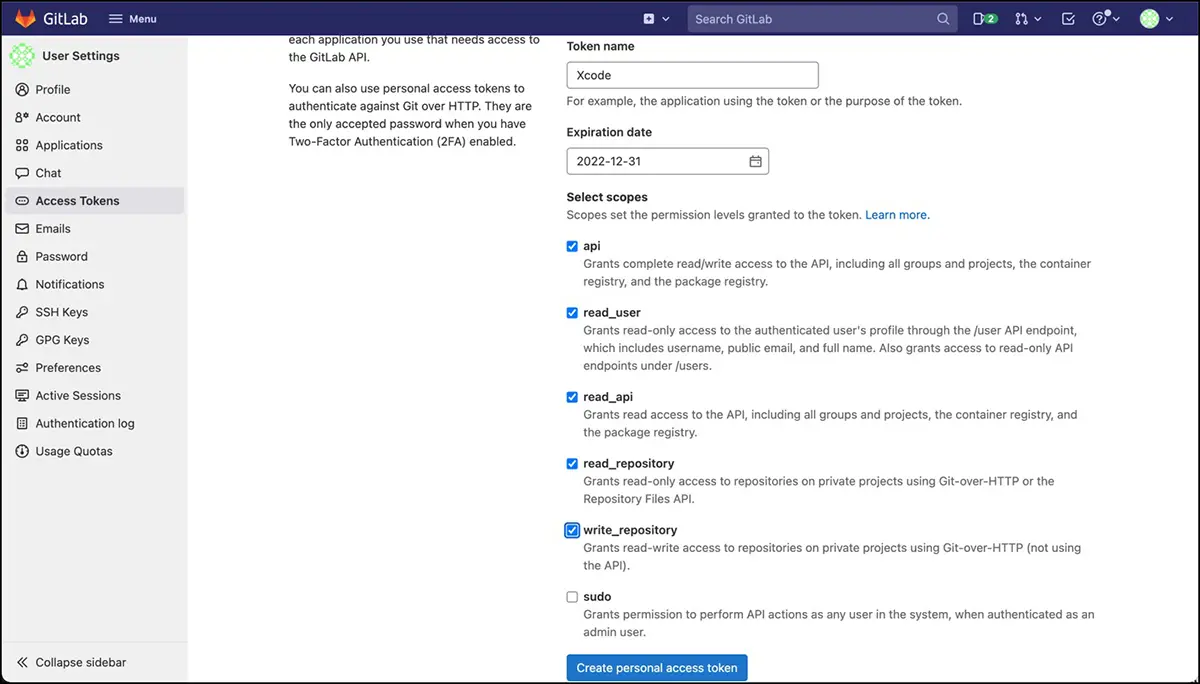
(6) Click on “Create personal access token”.
(7) The generated access token will appear under “Your new personal access token”. Ensure to copy and save it.
Remember, personal access tokens cannot be redisplayed. If lost, deactivate the old token and generate a new one.
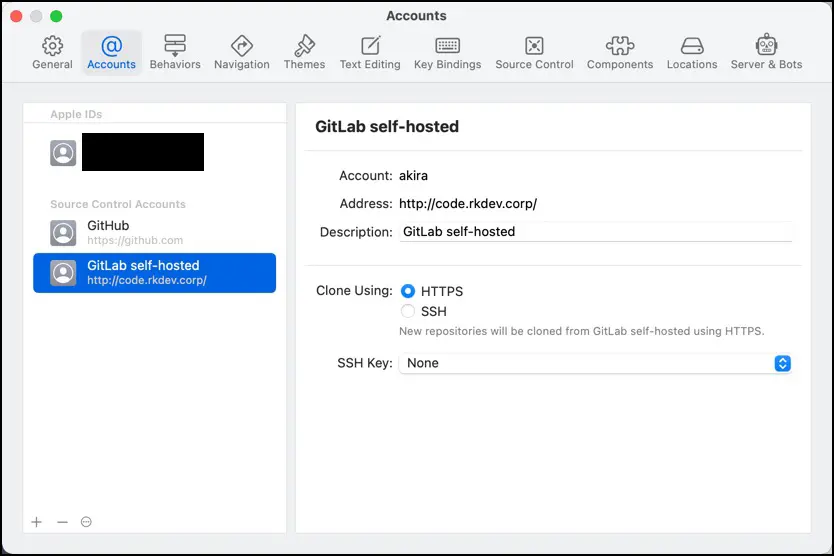
Setting up an account with Xcode
Follow the steps below to set up an account in Xcode.
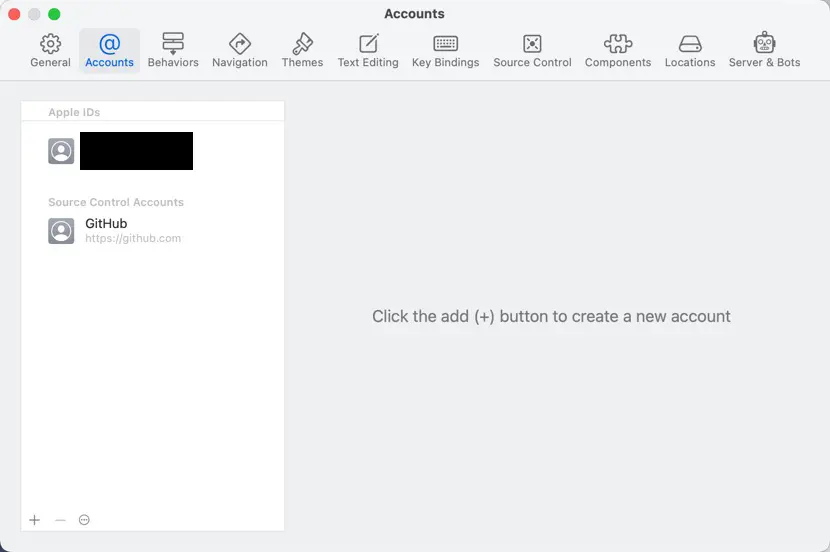
(1) In Xcode, select “Preferences…” from the “Xcode” menu.
(2) Open the “Accounts” tab.
(3) Click on the “+” button in the lower-left corner of the account list.
(4) Select “GitLab self-hosted” to connect to the enterprise and community versions of GitLab; select “GitLab.com” to connect to the SaaS version hosted at GitLab.com.
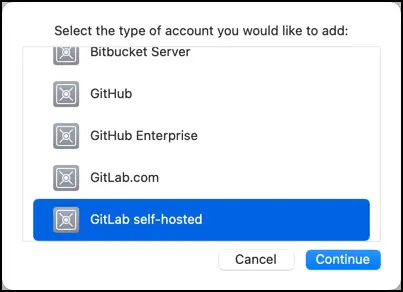
(5) Click the “Continue” button.
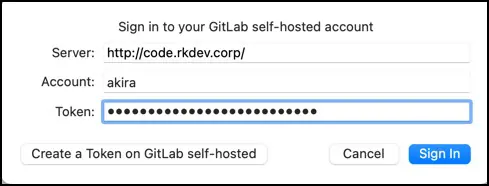
(6) Enter the URL in “Server,” the account in “Account,” and the personal access token in “Token,” then click the “Sign In” button.
Only the Enterprise and Community editions display the ” Server ” field.
(7) Once you return to the “Accounts” tab, you should see the account you entered added to the list.