


Flutter officially supports creating the native menu bar for macOS desktop apps since version 3.0.
We wanted to explore whether we could implement Mac-specific features with Flutter. The native menu bar is one of the Mac-specific features.
We examined Flutter’s GitHub-hosted issues, reviewed the release notes, and identified the following pull request.

You can see the following description in the release note of Flutter 3.0.
Implements a PlatformMenuBar widget and associated data structures by @gspencergoog in https://github.com/flutter/flutter/pull/100274
From the Flutter 3.0 release notes
We can see that Flutter can create the Mac native menu bar. To delve deeper, we crafted a sample code and uploaded it to our GitHub repository.
Classes for the menu bar
Flutter has the following classes to implement the native menu bar.
PlatformMenuBarPlatformMenuPlatformMenuItemGroupPlatformMenuItem
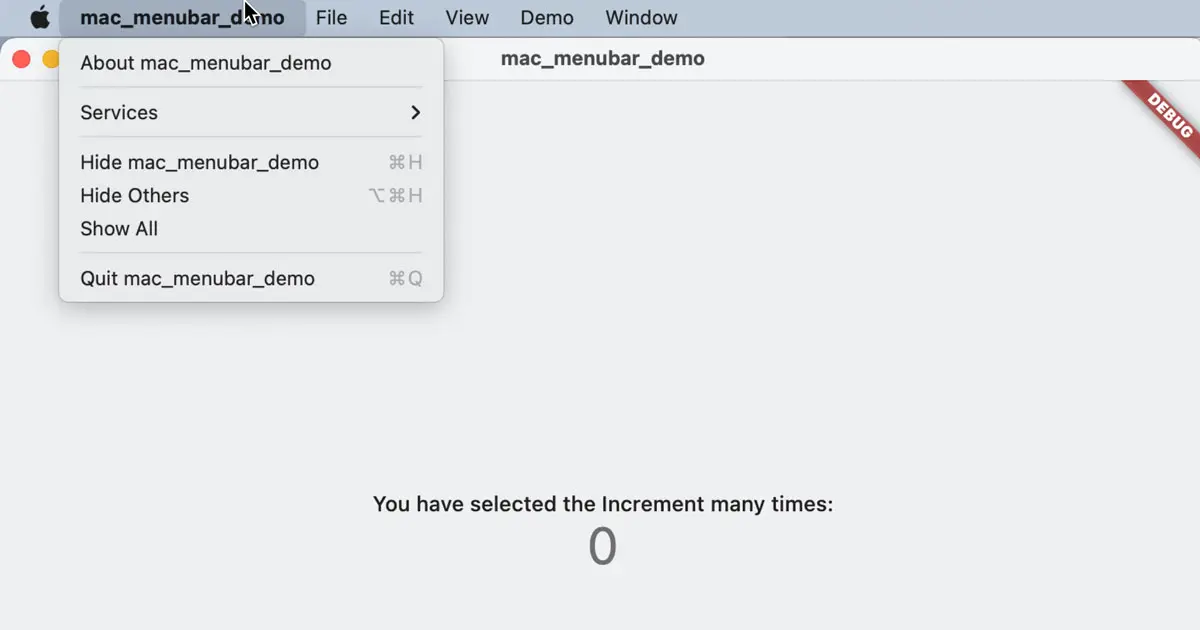
You can create the menu bar looking like the following.
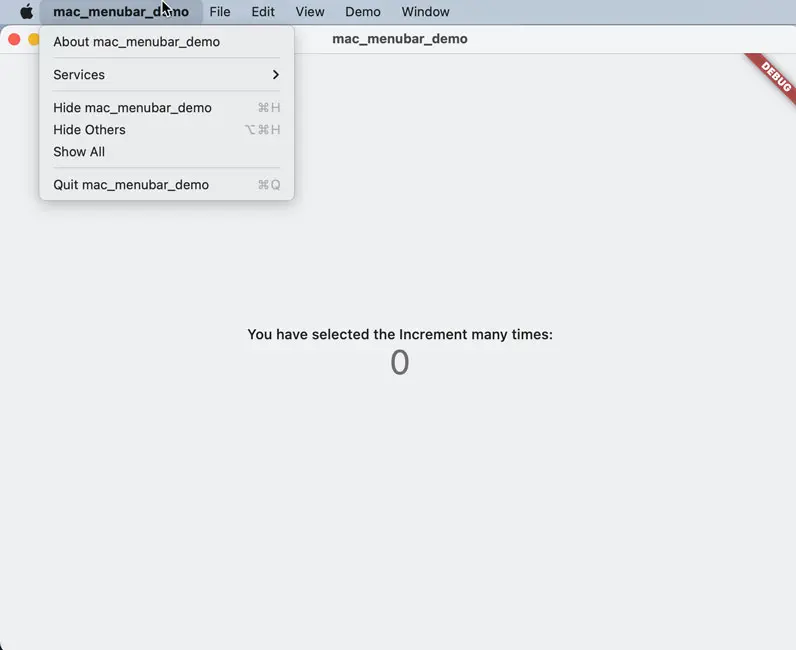
Create the menu bar
You can create the menu bar with the PlatformMenuBar class. The PlatformMenuBar class is a widget that inherited the StatefulWidget class. Write the following code to create the menu bar with the PlatformMenuBar class. However, the menu bar is empty at this time.
class _MyHomePageState extends State<MyHomePage> {
    @override
    Widget build(BuildContext context) {
        return PlatformMenuBar(
            menus: <MenuItem> [
            ],
            body: Center(
// Omission
            ),
        );
    }
}
Create the menu
To create the menu, follow the steps below.
- Allocate the instance of
PlatformMenufor each menu, such as the File and the Edit menus. - Put them into an array.
- Specify it to the
menusargument of thePlatformMenuBarconstructor.
return PlatformMenuBar(
  menus: <MenuItem>[
    PlatformMenu(/*Omission*/), // Application Menu
    PlatformMenu(/*Omission*/), // File Menu
    PlatformMenu(/*Omission*/), // Edit Menu
    PlatformMenu(/*Omission*/), // View Menu
    PlatformMenu(/*Omission*/), // Window Menu
  ],
  body: Center(
  ),
);
The menu title and items
You can specify the menu title to the label argument and items to the menus argument.
For example, the following code creates the File menu with only the item New.
PlatformMenu(
  label: 'File',
  menus: <MenuItem>[
    PlatformMenuItemGroup(
      members: <MenuItem>[
        PlatformMenuItem(
          label: 'New',
        ),
      ],
    ),
  ],
),
A typical macOS app menu structure
A typical Mac application has the following menus.
- Apple Menu
- Application Menu
- File Menu
- Edit Menu
- View Menu
- Application Specific Menus
- Window Menu
- Help Menu
This is not a rule. Therefore, Flutter doesn’t create menus automatically that the application doesn’t create.
However, Apple and Application menus are automatically created even if the application doesn’t create any menus. The application creates the contents of the Application menu.
The Human Interface Guidelines explain the typical menus.

Create the separator item
In AppKit, the menu item and the separator are an instance of the NSMenuItem class. The separator is one of the menu items.
In contrast, Flutter handles this differently. The separator is a group delimiter that splits menu items into some groups. For example, the following menu has two separators. In Flutter, items in this menu are divided into three groups.
- Item 1
- Item 2
- Separator
- Item 3
- Item 4
- Separator
- Item 5
To create the group, you can use the PlatformMenuItemGroup class. For example, the code implements the above menu as the following.
PlatformMenu(
  label: 'MyMenu',
  menus: <MenuItem>[
    PlatformMenuItemGroup(
      members: <MenuItem>[
        PlatformMenuItem(/*Omission*/), // Item 1
        PlatformMenuItem(/*Omission*/), // Item 2
      ],
    ),
    PlatformMenuItemGroup(
      members: <MenuItem>[
        PlatformMenuItem(/*Omission*/), // Item 3
        PlatformMenuItem(/*Omission*/), // Item 4
      ],
    ),
    PlatformMenuItemGroup(
      members: <MenuItem>[
        PlatformMenuItem(/*Omission*/), // Item 5
      ],
    ),
  ],
),
Flutter inserts separators between these groups.
Create the menu item
To create the menu item, you can use the PlatformMenuItem class.
PlatformMenuItem(
  label: 'Item Title',
),
You can specify the menu item’s title to the label argument.
Implement the procedure executed when selected
You can specify the code executed when the item is selected to the argument the onSelected.
PlatformMenuItem(
  label: 'Increment',
  onSelected: () {
    // The procedure exected when selected
    _incrementCounter();
  },
),
In the above example, the _incrementCounter() method is executed when the Increment menu item is selected.
Assign the shortcut key
To assign the shortcut key, you can specify it to the shortcut argument. The shortcut is the instance of the SingleActivator class.
PlatformMenuItem(
  label: 'Increment',
  shortcut: const SingleActivator(LogicalKeyboardKey.keyI, meta: true),
  onSelected: () {
    _incrementCounter();
  },
),
In this example, you can select the menu item by pressing the I key with the Command key.
The key pressing with the modifier keys is defined in the LogicalKeyboardKey class. The modifier key is specified with the arguments of the SingleActivator class constructor. The following arguments are defined.
| Paramter | Modifier Key |
|---|---|
control | Control Key |
shift | Shift Key |
alt | Option Key |
meta | Command Key |
The platform’s native menu item
The application can’t implement the “Sevice” and “Show All” menu items of the Application Menu. To create the platform native menu item such as these items, you can use the PlatformProvidedMenuItem class.
PlatformMenuItemGroup(
  members: <MenuItem>[
    if (PlatformProvidedMenuItem.hasMenu(PlatformProvidedMenuItemType.servicesSubmenu))
      const PlatformProvidedMenuItem(type: PlatformProvidedMenuItemType.servicesSubmenu),
  ],
),
The hasMenu() method checks and returns whether the running platform supports the item specified in the method argument.
You can specify the item you want to create to the type argument of the PlatformProvidedMenuItem class constructor. The following items are defined at the writing time.
aboutquitservicesSubmenuhidehideOtherApplicationsshowAllApplicationsstartSpeakingstopSpeakingtoggleFullScreenminimizeWindowzoomWindowarrangeWindowsInFront
Flutter 3.0 only defines macOS-specific menu items.
Sample Code
The sample code is available on GitHub. Please see the sample code for the code examples.


