


This article provides instructions on how to write a callback function using Swift’s closure for interfacing with a library written in C++ from Swift application.
Swift and C++ Interoperability (as of August 4, 2022)
Swift and C++ do not have direct interoperability as of this writing. The extensions necessary for interoperability are still in the implementation process and are included as experimental features.
You can utilize the experimental functionality if it meets your needs. However, remember it’s still in the “experimental implementation” stage, meaning we are still investigating potential defects. Hence, using it for applications or products intended for distribution is not advisable.
For those who would like to try an experimental implementation and see how it works
If you want to try an experimental implementation, follow the steps below.
(1) Open the build settings.
(2) Add the following settings to “Other Swift Flags” in “Swift Compiler – Custom Flags”.
-enable-experimental-cxx-interop
For more information on the implementation progress and other related aspects, please refer to the designated repository where the current status is documented.
On a personal note, I’ve tried this out and found it quite engaging.
Via Objective-C++
Until interoperability with C++ is formally implemented, it is practical to call processes implemented in C++ via Objective-C++; to implement the callback function in Swift’s closure, do the following.
- Implement a wrapper class that executes
C++code in anObjective-C++class. - Implement
C++callback functions inObjective-C++. - Execute
C++callback functions from the wrapper class and pass the callback function of 2. - Execute a block from the callback function in 2.
- Use a wrapper class from
Swiftand implement the block with aSwiftclosure.
It is hard to understand in writing. So let’s write a test program.
Implement a test program
Here we implement the process of getting a list of files in a directory using FTS as a C++ class. This class executes a callback function for each file or directory it finds.
Implement the wrapper class for this C++ class as an Objective-C++ class. Also, implement the callback function in a C++ class.
Implement the Swift code that uses the Objective-C++ wrapper class; the Swift part will be a macOS app implemented in SwiftUI. The part that outputs to the console will be implemented in a Swift closure.
Create a project
You should create a project as a macOS app utilizing SwiftUI.
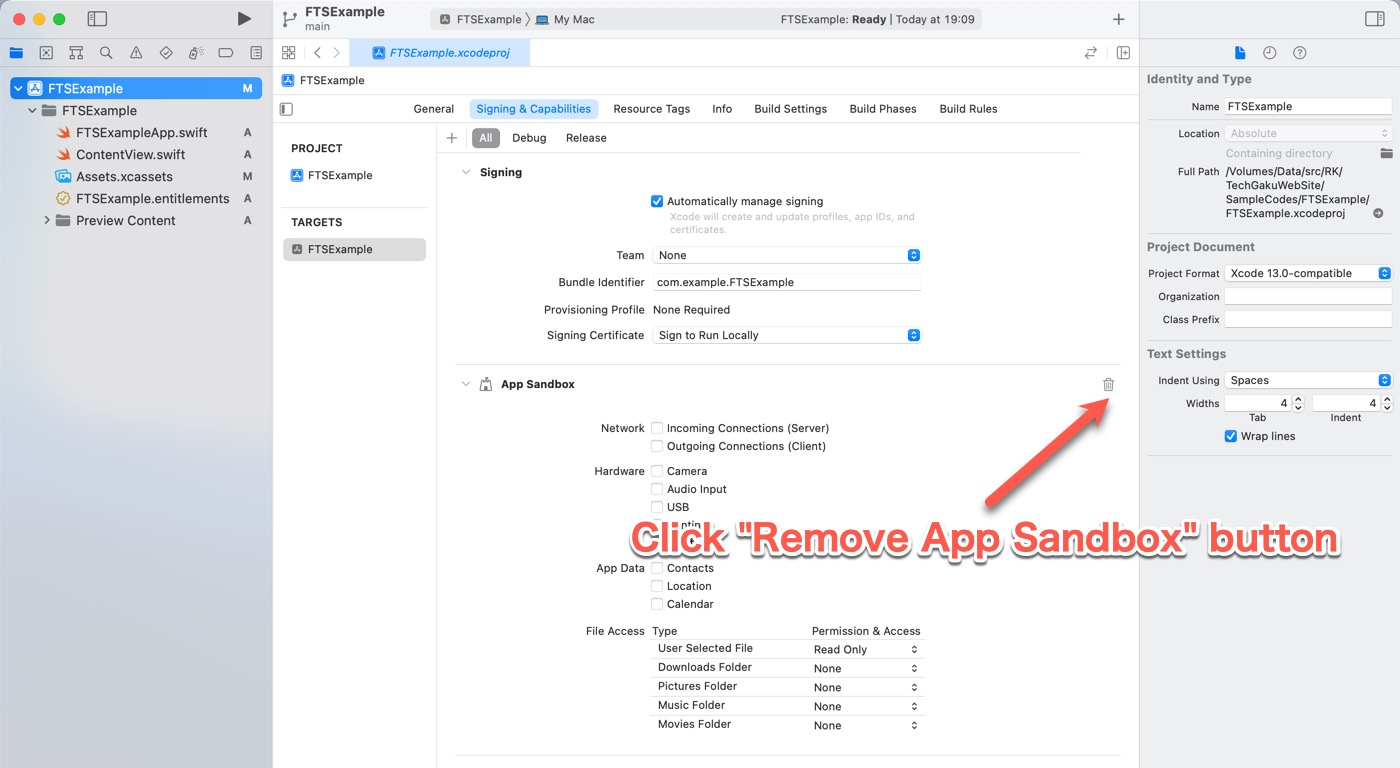
Since this is a local test program, please also remove the sandbox. Operate as follows.
(1) Open the target’s settings and go to the “Signing & Capabilities” tab.
(2) Click the “Remove App Sandbox” button.
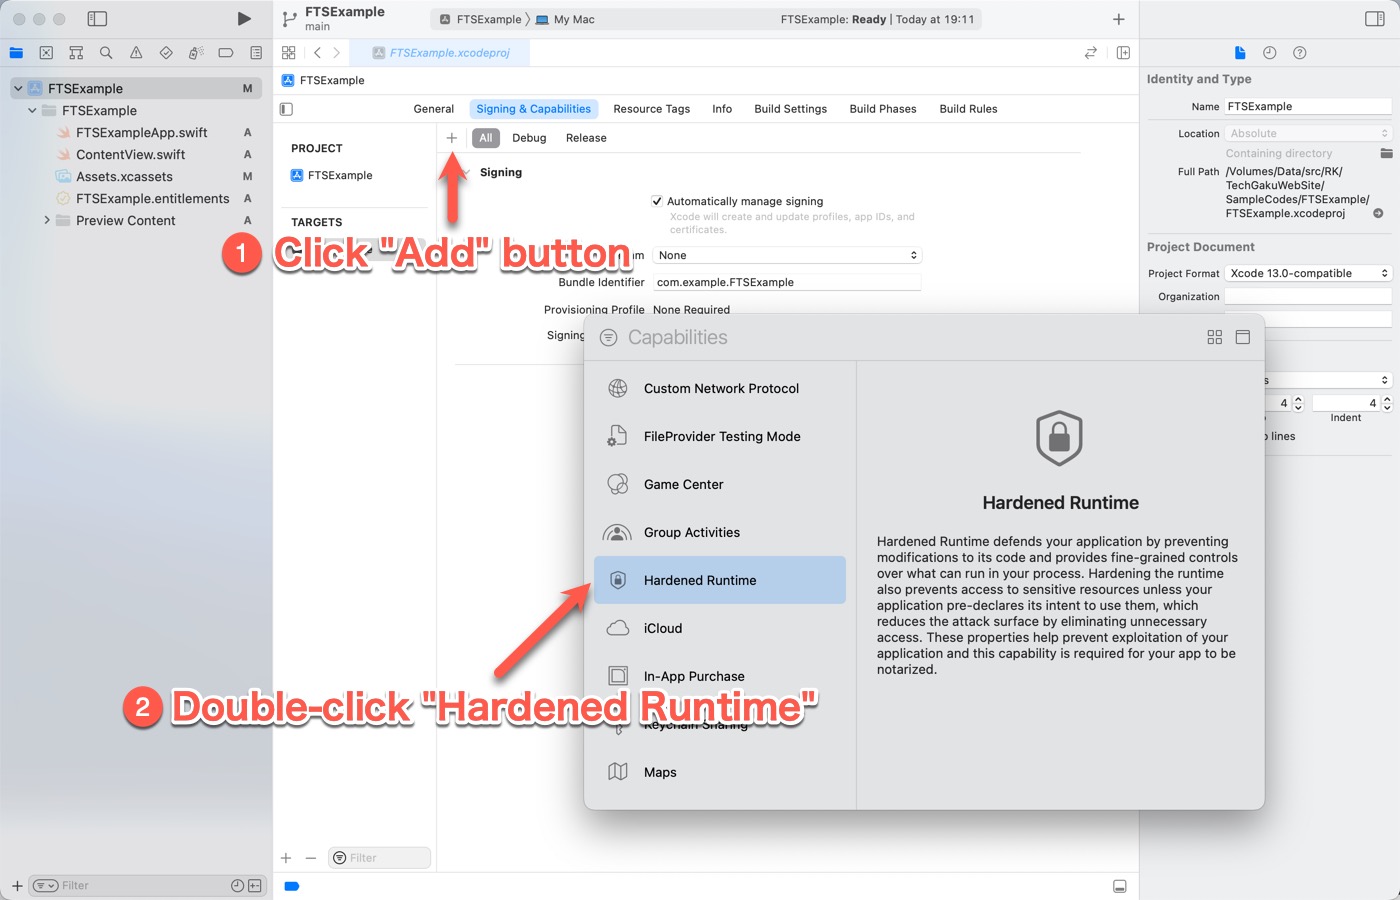
(3) Click the Add button. The Capabilities window will appear.
(4) Double-click “Hardened Runtime”. Hardened Runtime” will be added.
Implement directory scanning
Implement in C++. The code is the following.
//
//  DirectoryScanner.hpp
//  FTSExample
//
//  Created by Akira Hayashi on 2022/08/05.
//

#ifndef DirectoryScanner_hpp
#define DirectoryScanner_hpp

#include <string>

class DirectoryScanner {
public:
    typedef bool (*ItemCallBackProc)(const std::string &path, void *pParam);

    DirectoryScanner() {}
    virtual ~DirectoryScanner() {}

    void scan(const std::string &directoryPath, ItemCallBackProc callbackProc, void *pParam);
};

#endif /* DirectoryScanner_hpp */
//
//  DirectoryScanner.cpp
//  FTSExample
//
//  Created by Akira Hayashi on 2022/08/05.
//

#include "DirectoryScanner.hpp"
#include <sys/types.h>
#include <sys/stat.h>
#include <fts.h>
#include <set>

void DirectoryScanner::scan(const std::string &directoryPath, ItemCallBackProc callbackProc, void *pParam)
{
    int options = (FTS_NOSTAT | FTS_NOCHDIR | FTS_PHYSICAL);
    char *paths[] = {const_cast<char *>(directoryPath.c_str()), NULL};

    FTS *fts = fts_open(paths, options, NULL);

    if (fts)
    {
        std::set<std::string> pathSet;
        FTSENT *entry = NULL;

        while ((entry = fts_read(fts)) != NULL)
        {
            // Don't go to the sub directory
            if (entry->fts_level == 1)
            {
                std::string path(entry->fts_path);

                if (pathSet.find(path) == pathSet.end())
                {
                    pathSet.insert(path);
                    if (!(*callbackProc)(path, pParam))
                    {
                        break;
                    }
                }
            }
        }

        fts_close(fts);
    }
}
Wrapper Class and Callback Function Implementation
Implement the wrapper class, which is used by Swift and the callback function, which is passed to `DirectoryScanner::scan` of C++ in Objective-C++. The code is the following.
//
//  DirectoryScannerWrapper.h
//  FTSExample
//
//  Created by Akira Hayashi on 2022/08/05.
//

#import <Foundation/Foundation.h>

@interface DirectoryScannerWrapper : NSObject

- (void)scanWithDirectoryPath:(nonnull NSString *)path
                        block:(nonnull BOOL (^)(NSString * _Nonnull directoryPath))block;

@end
//
//  DirectoryScannerWrapper.m
//  FTSExample
//
//  Created by Akira Hayashi on 2022/08/05.
//

#import "DirectoryScannerWrapper.h"
#import "DirectoryScanner.hpp"

struct Context {
    BOOL (^block)(NSString * _Nonnull dirPath);
};

static bool ScannerCallBack(const std::string &path, void *pParam)
{
    @autoreleasepool
    {
        Context *context = reinterpret_cast<Context *>(pParam);
        return context->block([NSString stringWithUTF8String:path.c_str()]);
    }
}

@implementation DirectoryScannerWrapper

- (void)scanWithDirectoryPath:(nonnull NSString *)path
                        block:(BOOL (^)(NSString * _Nonnull directoryPath))block
{
    Context context = {};
    context.block = block;

    DirectoryScanner scanner;
    scanner.scan(std::string(path.UTF8String), &ScannerCallBack, &context);
}

@end
The bridge header does not include the C++ header, only the Objective-C++ header. Therefore, it will look like this.
// FTSExample-Briding-Header.h

#import "DirectoryScannerWrapper.h"
Swift app-side code
Implement app-side code as follows in ContentView.swift.
//
//  ContentView.swift
//  FTSExample
//
//  Created by Akira Hayashi on 2022/08/05.
//

import SwiftUI

struct ContentView: View {
    var body: some View {
        VStack {
            Text("DirectoryScanner")
                .font(.largeTitle)
                .padding()
            Text("Click the 'Scan' button.")
                .padding()
            Button("Scan") {
                let action = ScanButtonAction()
                action.execute()
            }
        }
        .frame(width: 400, height: 300, alignment: .center)
    }
}

struct ContentView_Previews: PreviewProvider {
    static var previews: some View {
        ContentView()
    }
}
The process when a button is pressed, ScanButtonAction.swift is created and separated from the view as follows. The code is as follows.
//
//  ScanButtonAction.swift
//  FTSExample
//
//  Created by Akira Hayashi on 2022/08/05.
//

import AppKit

struct ScanButtonAction {
    func execute() {
        let openPanel = NSOpenPanel()
        openPanel.canChooseFiles = false
        openPanel.canChooseDirectories = true

        if openPanel.runModal() == .OK {
            let scanner = DirectoryScannerWrapper()
            scanner.scan(withDirectoryPath: openPanel.url!.path) { path in
                print("\(path)")
                return true
            }
        }
    }
}
Running Test
Run the application and click the “Scan” button. A file selection dialog will appear, so select the directory from which you want to retrieve the file list. The paths of the files/directories in the selected directory will be output to the console.
In the DirectoryScanner::scan() method, change the entry->fts_level == 1 to entry->fts_level > 0 so that subdirectories will also be scanned.
Download the sample code
The sample code created for this article can be downloaded here.


