When you create a document with figures and tables in Word, are you writing it like this?
See the diagram above.
It is written in the following table.
The table on the next page shows the total results.
Although the preceding and following context will tell you which figure or table is referred to, the following sentence would be more professional.
See Figure 2.
It is written in Table 1.
See Table 2 Results.
Using figure and table numbers uniquely determines which figure or table is being referred to.
This article will explore the feature in Microsoft Word that allows you to insert chart numbers.
TOC
Insert a table or figure number
STEP
Click the “Shapes” button in the “Insert” tab and draw shapes.
Draw it in a position that allows about four lines of text to be written on top.
STEP
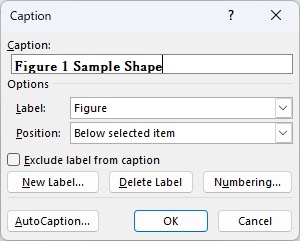
Right-click the shape and select the “Insert Caption…”.
STEP
Select the “Figure” from the label, the “Below selected item” from the Position, and append the “Sample Figure” to the Caption.
Suppose the “Figure” is not available on the label. In that case, you can add a new label by clicking the “New Label…” button, entering the label text, and then clicking the “OK” button.
Set the number of figures to be inserted
STEP
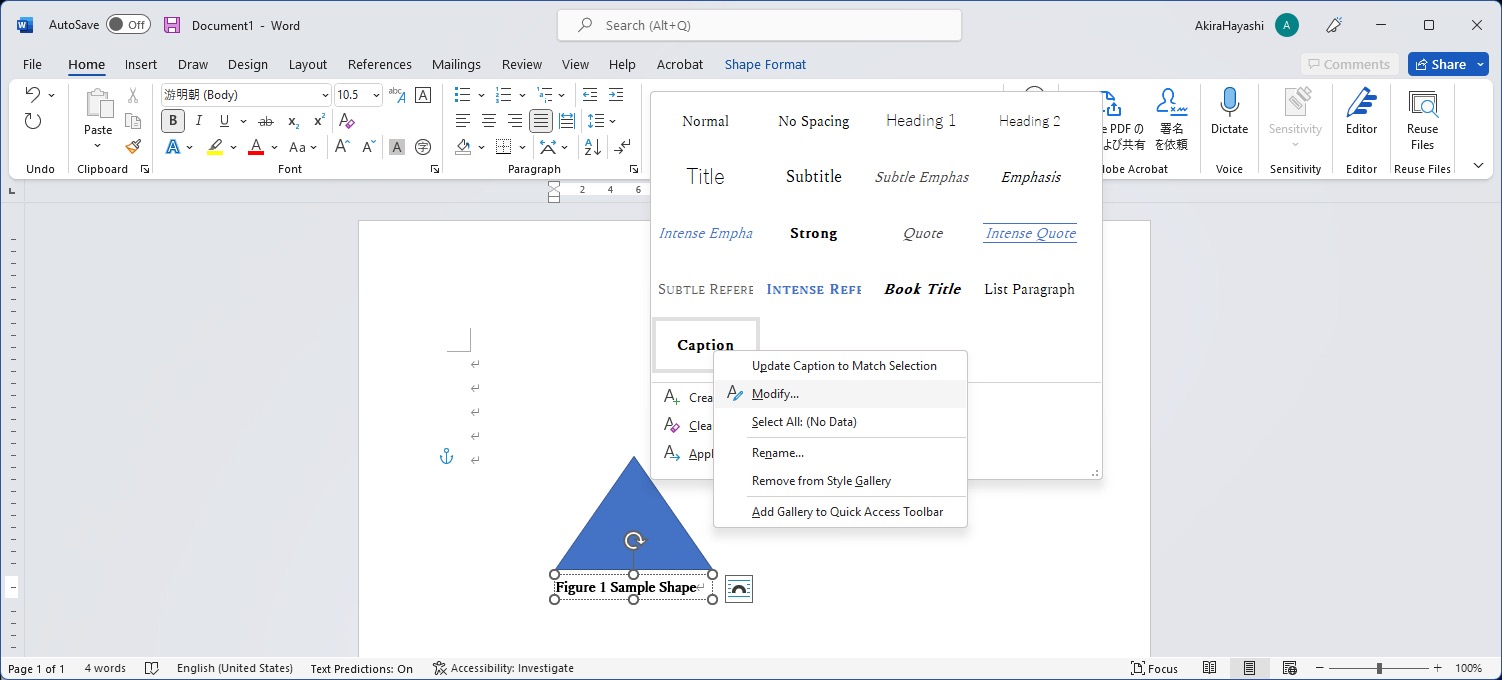
Open the “Home” tab and check if the text style “Caption” is displayed. If not, click the “Other” button in the lower right corner of the style list to display it.
Show hidden paragraph styles
STEP
Right-click on “Caption” and select “Modify…”.
Modify the paragraph style “Caption”
STEP
Change the line alignment to “Centered” and click the “OK” button.
Set line alignment to centered
Chart numbers are inserted.
Refer to Figure Number
When referring to a figure number, use the cross-reference function instead of directly typing “Figure 1” or similar.
STEP
Open the “References” tab and click the “Cross-reference” button.
Click the Cross-reference button
STEP
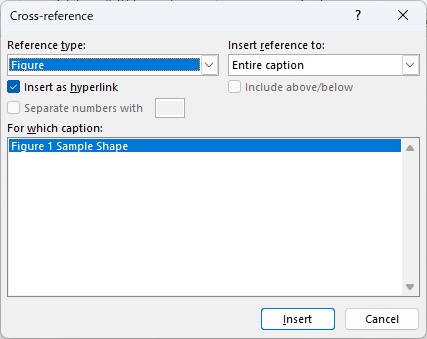
Select the “Figure” from the “Reference type” and select the “Entire caption” from the “Insert reference to”.
STEP
Select the “Figure 1 Sample Figure” that has already been inserted in the “For which caption” section, and click the “Insert” button.
Insert reference to “Figure 1 Sample Figure”
STEP
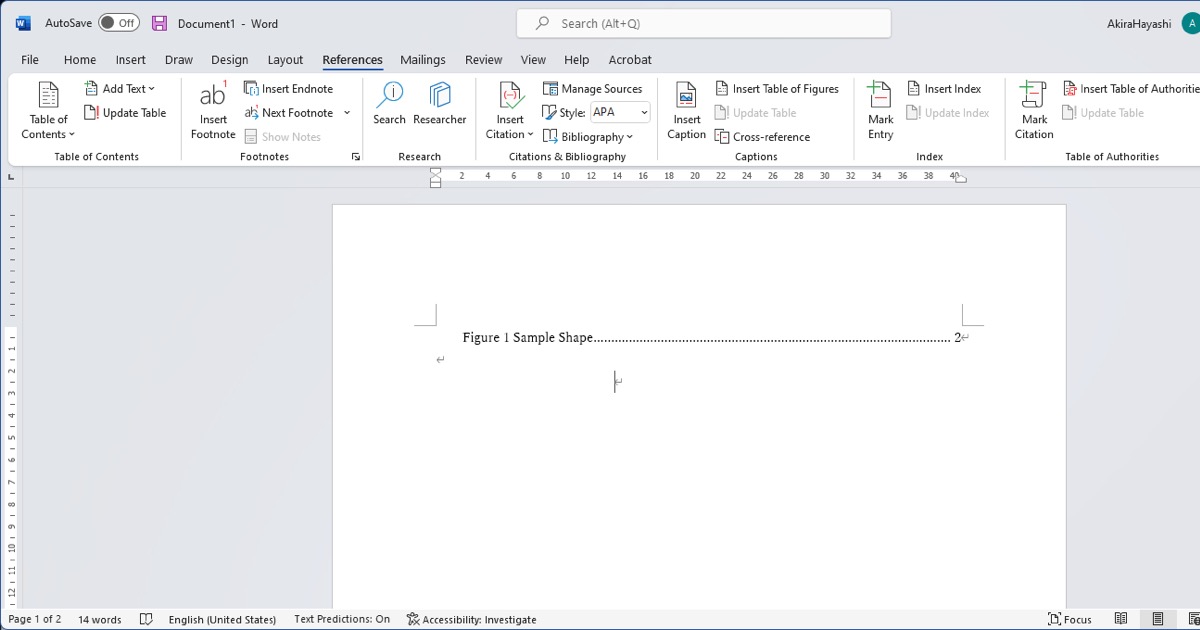
The “Figure 1 Sample Figure” will be inserted at the cursor position. Click the “Close” button to close the dialog.
STEP
Before the inserted reference string, type “See “and append the “.” to the end of the line to complete the sentence.
Documents containing references to chart numbers
Create a table of contents for figures and tables
The Insert Table of Figures function can be used to create a table of contents for figures and tables.
STEP
Move the cursor in front of the inserted “Figure 1 Sample Figure” and press the return key to start a new line.
STEP
Move the cursor to the top and then click the “Blank Page” button on the “Insert” tab so the figure is on a separate page.
Insert a blank page
STEP
Move the cursor to the top of the new page inserted and click the “Insert Table of Figures” button on the “References” tab.
Insert table of contents for figures and tables
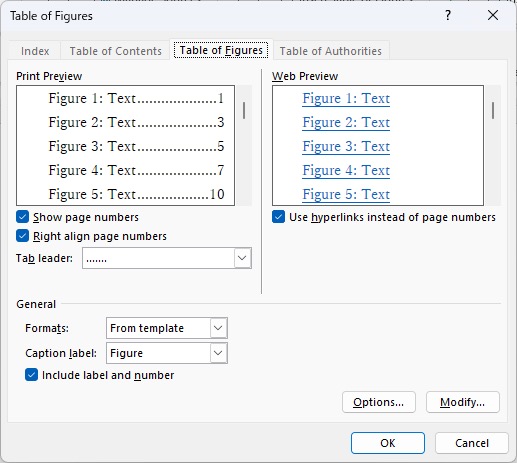
STEP
Since the default settings are fine, click the “OK” button to close the “Table of Figures” dialog box.
Setting Table of Figures
STEP
A table of figures is inserted.
Table of Figures
Conclusion
In this article, we have inserted a figure number. The same procedure can also be used to insert table numbers and equation numbers. Moreover, when you use the cross-reference function of a figure number, it’s not merely inserted as a string. Still, it is also a hyperlink, so you can jump to the referenced figure or table when you output it as a PDF.
Furthermore, when items are inserted in the middle of the document, and their numbers change, these are updated accordingly, helping prevent omissions when modifications are made.
アールケー開発代表。Appleプラットフォーム向けの開発を専門としているソフトウェアエンジニア。ソフトウェアの受託開発、技術書執筆、技術指導・セミナー講師。note, Medium, LinkedIn
-
Representative of RK Kaihatsu. Software Engineer Specializing in Development for the Apple Platform. Specializing in contract software development, technical writing, and serving as a tech workshop lecturer. note, Medium, LinkedIn