


GitLab has a Continuous Integration (CI) feature that allows you to perform continuous integration without deploying a separate solution dedicated to CI.
Therefore, whenever I push my code to GitLab, XCTest is triggered to run unit tests for macOS and iOS apps.
Register the runners
In GitLab CI/CD, a Runner runs the process. There are two types of Runners: the Shared Runner, which is shared between projects, and the Specific Runner, which is dedicated to a particular project.
For this instance, I registered a “Shared Runner” to use it across multiple projects(repositories).
Install a Runner
Since this is the Runner used to run XCTest, you need to install it on the Mac that will run XCTest. Here, I used a Mac Mini.
The official website explains instructions for installing GitLab Runner on macOS.
The binary to download is different for the Intel Mac and the Apple Silicon. Download in the terminal with curl.
For Intel Mac:
sudo curl --output /usr/local/bin/gitlab-runner "https://gitlab-runner-downloads.s3.amazonaws.com/latest/binaries/gitlab-runner-darwin-amd64"For Apple Silicon:
sudo curl --output /usr/local/bin/gitlab-runner "https://gitlab-runner-downloads.s3.amazonaws.com/latest/binaries/gitlab-runner-darwin-arm64"This command will download the Runner into the /usr/local/bin/gitlab-runner directory.
sudo chmod +x /usr/local/bin/gitlab-runnercd ~
gitlab-runner installYou will need to open the ~/Library/LaunchAgents/gitlab-runner.plist file, which is created by running the git-lab-runner install command.
<?xml version="1.0" encoding="UTF-8"?>
<!DOCTYPE plist PUBLIC "-//Apple//DTD PLIST 1.0//EN" "http://www.apple.com/DTDs/PropertyList-1.0.dtd">
<plist version="1.0">
<dict>

<!-- omission -->

	<key>EnvironmentVariables</key>
	<dict>
		<key>LC_ALL</key>
		<string>en_US.UTF-8</string>
	</dict>
</dict>Normal users do not have read and write permissions for the default log file paths, causing the gitlab-runner to fail upon execution. To make the log files readable and writable, change the value of the StandardOutPath and StandardErrorPath to change the log files’ path.
<?xml version="1.0" encoding="UTF-8"?>
<!DOCTYPE plist PUBLIC "-//Apple//DTD PLIST 1.0//EN" "http://www.apple.com/DTDs/PropertyList-1.0.dtd">
<plist version="1.0">
<dict>

<!-- omission -->

	<key>StandardOutPath</key>
	<string>/Users/USER_NAME/.gitlab-runner/gitlab-runner.out.log</string>
  <key>StandardErrorPath</key>
	<string>/Users/USER_NAME/.gitlab-runner/gitlab-runner.err.log</string>
gitlab-runner startRegister a Runner
Register the Runner that you’ve installed on your Mac with GitLab.
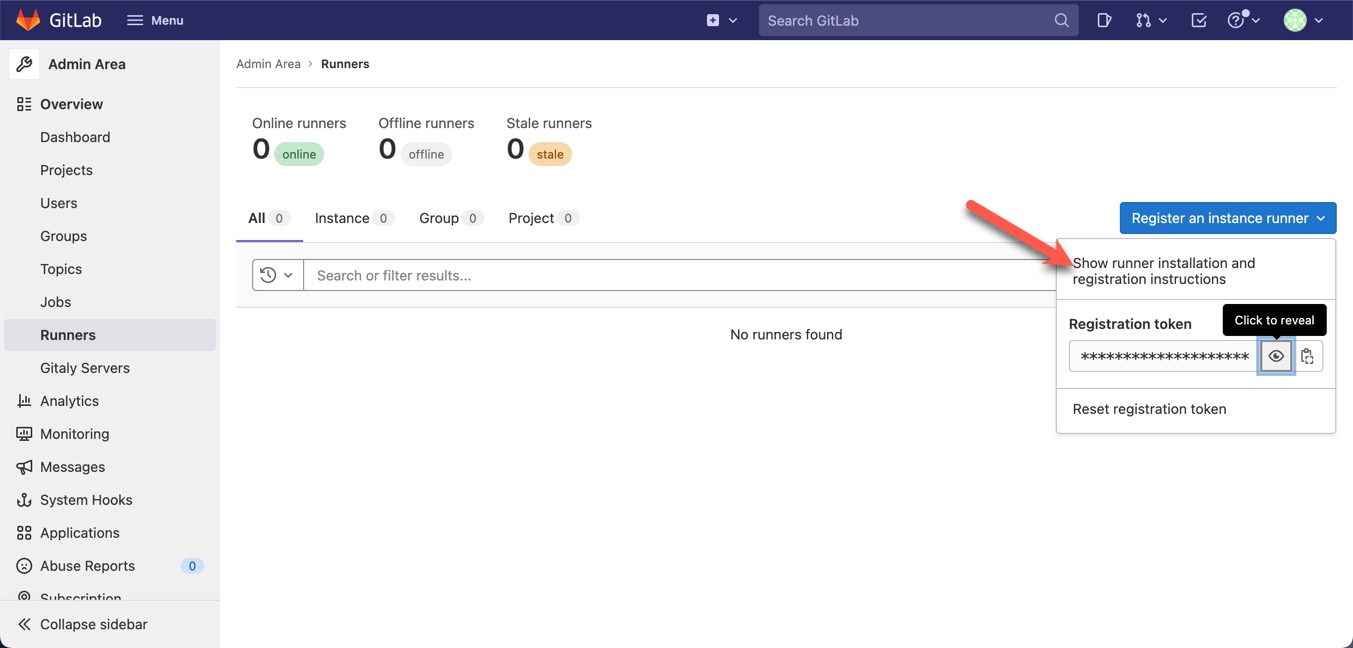
(1) Open the “Runners” in the “Admin Area”.
(2) Click the “Register an instance runner”, and click the “Show runner installation and registration instructions”.
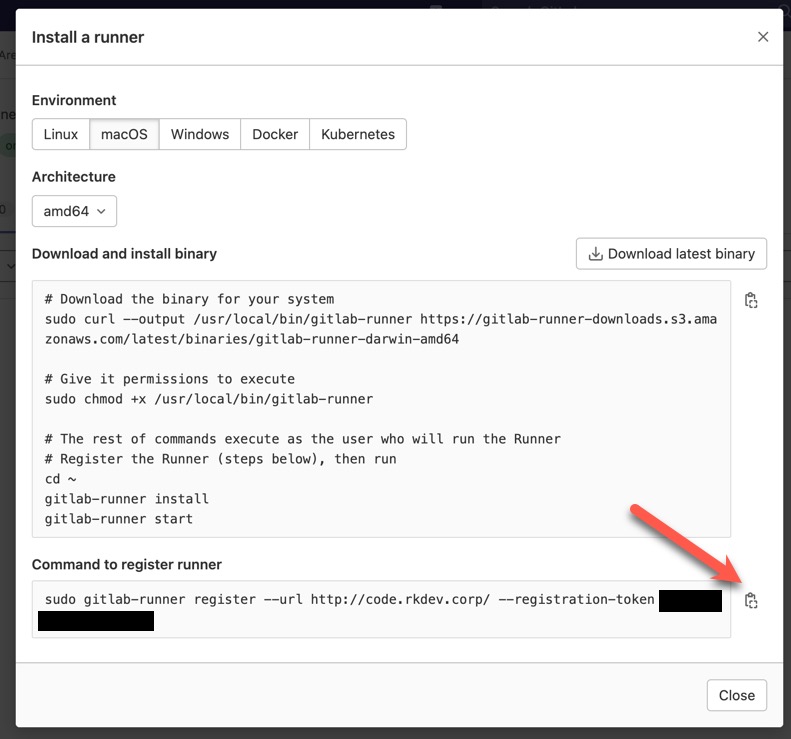
(3) The detailed instructions are displayed, select macOS from Environment, click the Copy button next to the field labeled “Command” to register Runner, copy the command, and click Close to close.
(4) Execute the command you copied in STEP 3 on the Mac where the Runner was installed, making sure to run it without sudo.
When running XCTest on a Mac, you must run it in user mode, so you need to run without sudo.
Once executed, you’ll be prompted to interactively enter those settings in the given order.
(5) Enter the GitLab URL.
Runtime platform                                    arch=amd64 os=darwin pid=10297 revision=76984217 version=15.1.0
Running in system-mode.

Enter the GitLab instance URL (for example, https://gitlab.com/):
[http://code.rkdev.corp/]:
(6) You will be asked for your registration token. Press the Enter key since you have already specified a token when executing the command.
Enter the registration token:
[-ABCDEFG4567890YZABC]:
(7) Enter the description of the Runner. In my case, I entered the machine name.
Enter a description for the runner:
[MacMini2020.local]: MacMini2020
(8) Enter the tags which will be assigned to the Runner.
In my case:
- The machine is a Mac.
- It is an Intel Mac.
- Its OS will always be the latest.
Based on these factors, the following three tags were set.
- mac
- mac-intel
- mac-intel-latest
Enter tags for the runner (comma-separated):
mac,mac-intel,mac-intel-latest
(9) Enter the memo for the maintenance. Nothing in particular, so I left it blank.
Enter optional maintenance note for the runner:(10) Enter the Executer.
The official website says to use shell for macOS and iOS apps, so I specified shell.
Registering runner... succeeded                     runner=-ABCDEFG
Enter an executor: custom, parallels, shell, ssh, kubernetes, docker, docker-ssh, virtualbox, docker+machine, docker-ssh+machine:
shell
(11) If the registration is successful, the output is as follows.
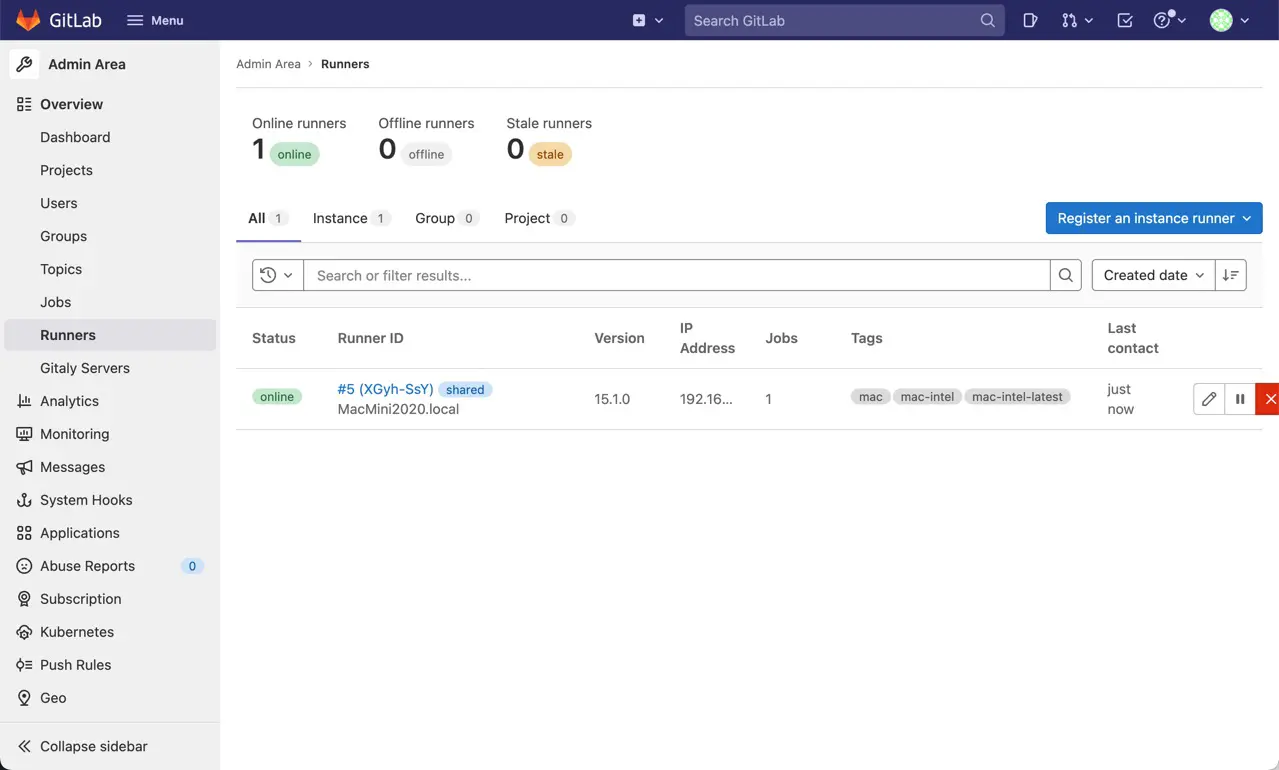
Runner registered successfully. Feel free to start it, but if it's running already the config should be automatically reloaded!(12) Reload the Runners page in the Admin Area to see the registered Runners.
Configure the CI/CD
Create a repository and code for testing and set up the CI/CD.
Test Code
Here, I aim to verify that XCTest operates correctly via GitLab CI. Thus, I’ve constructed a unit test containing code designed to always fail and code designed to always succeed. I hesitate to call it a test code since we are not testing anything, just making XCTest work.
import XCTest
@testable import CITest

class CITestTests: XCTestCase {

    override func setUpWithError() throws {
    }

    override func tearDownWithError() throws {
    }

    func testExample() throws {
        XCTFail("TEST FAILURE")
    }

    func testSuccess() throws {
        XCTAssertTrue(true);
    }
}
Activate the Shared Runner
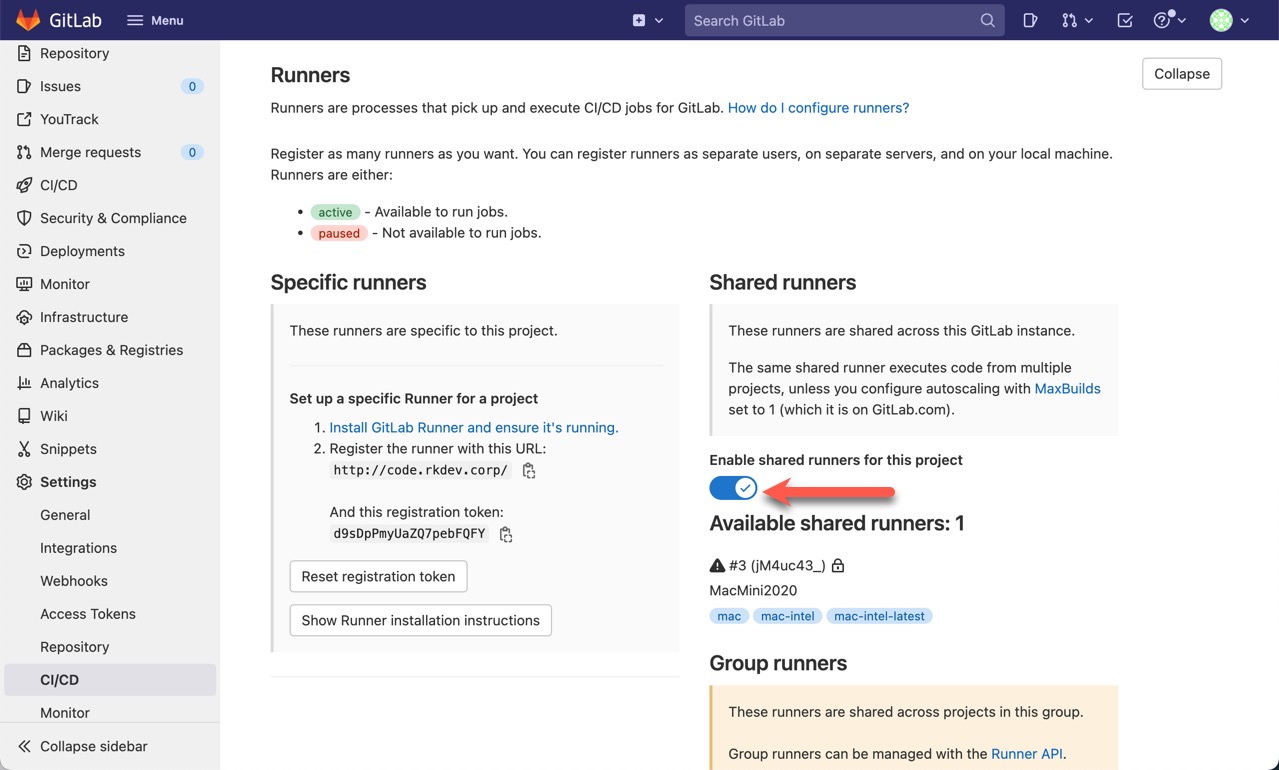
You must enable Shared Runner on a per-repository basis.
(1) Open the CI/CD in the project settings.
(2) Open the Expand of Runners.
(3) Turn on the “Enable shared runners for this project”.
Add the CI/CD configuration file
Add the CI/CD configuration file by doing the following.
(1) Open the repository page with the web browser and click the “Set up CI/CD” link.
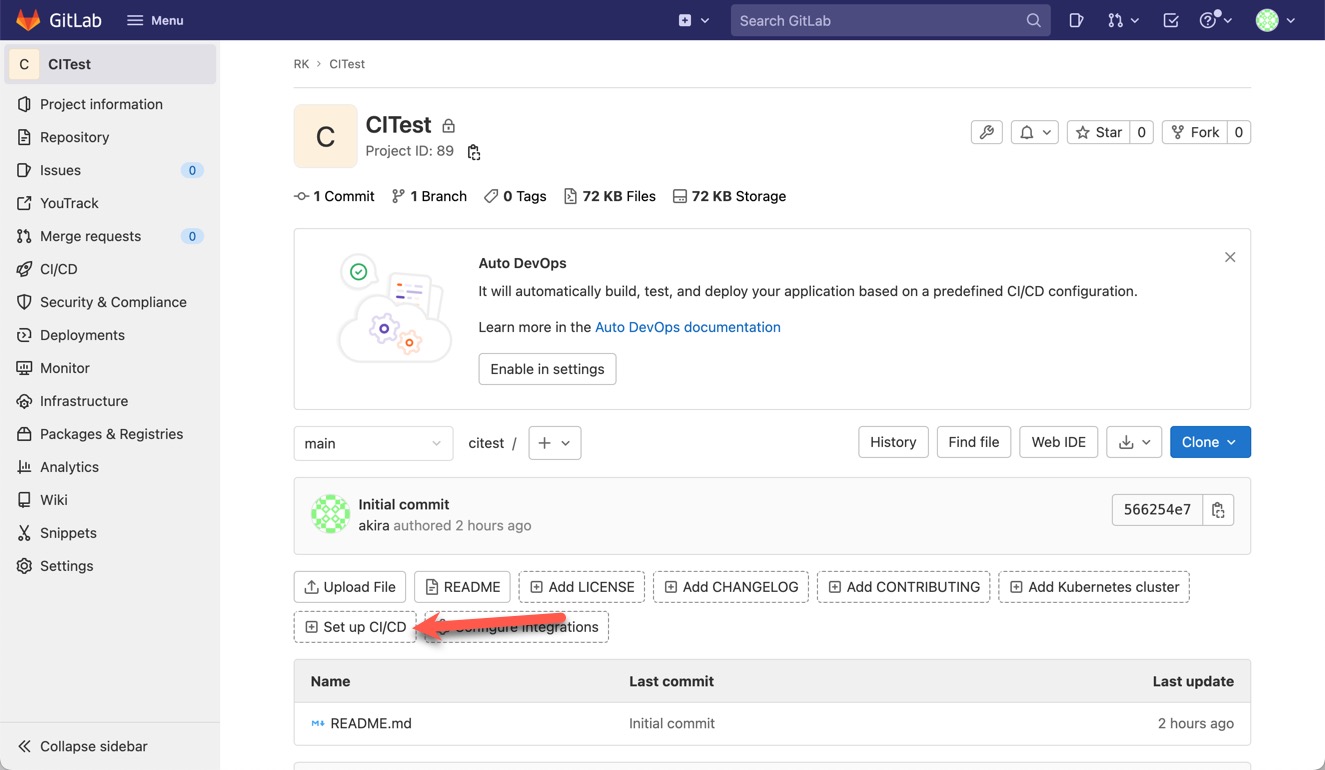
(2) Click the “Create new CI/CD pipeline” button.

(3) Click the “Browse templates’ link, open the “Swift.gitlab-ci.yml” and copy its contents.
(4) Back to the Pipeline Editor of your repository and paste the copied configuration.
(5) Change the Xcode project file name, scheme name, etc.
For example, I changed the following values in my test project file.
| Configuration | Value |
|---|---|
| -project | CITest.xcodeproj |
| -scheme | CITest |
| -destination | iOS Simulator,name=iPhone 13,OS=15.5 |
| tags | mac-intel-latest |
| -archivePath | build/CITest |
| -archivePath | build/CITest.xcarchive |
| -exportPath | build/CITest.ipa |
| -exportProvisioningProfile | “” |
| paths: | build/CITest.ipa |
stages:
  - build
  - test
  - archive
  - deploy

build_project:
  stage: build
  script:
    - xcodebuild clean -project CITest.xcodeproj -scheme CITest | xcpretty
    - xcodebuild test -project CITest.xcodeproj -scheme CITest -destination 'platform=iOS Simulator,name=iPhone 13,OS=15.5' | xcpretty -s
  tags:
    - mac-intel-latest

archive_project:
  stage: archive
  script:
    - xcodebuild clean archive -archivePath build/CITest -scheme CITest
    - xcodebuild -exportArchive -exportFormat ipa -archivePath "build/CITest.xcarchive" -exportPath "build/CITest.ipa" -exportProvisioningProfile ""
  rules:
    - if: $CI_COMMIT_BRANCH == $CI_DEFAULT_BRANCH
  artifacts:
    paths:
      - build/CITest.ipa
  tags:
    - mac-intel-latest
If you only need testing by CI and do not need archiving, remove the archive_project job and make the following configuration file. In my case, this is what I needed.
stages:
  - build
  - test
  - archive
  - deploy

build_project:
  stage: build
  script:
    - xcodebuild clean -project CITest.xcodeproj -scheme CITest | xcpretty
    - xcodebuild test -project CITest.xcodeproj -scheme CITest -destination 'platform=iOS Simulator,name=iPhone 13,OS=15.5' | xcpretty -s
  tags:
    - mac-intel-latest
See the following article for details on specifying the -destination option.
(6) Click the “Commit changes”.
Test
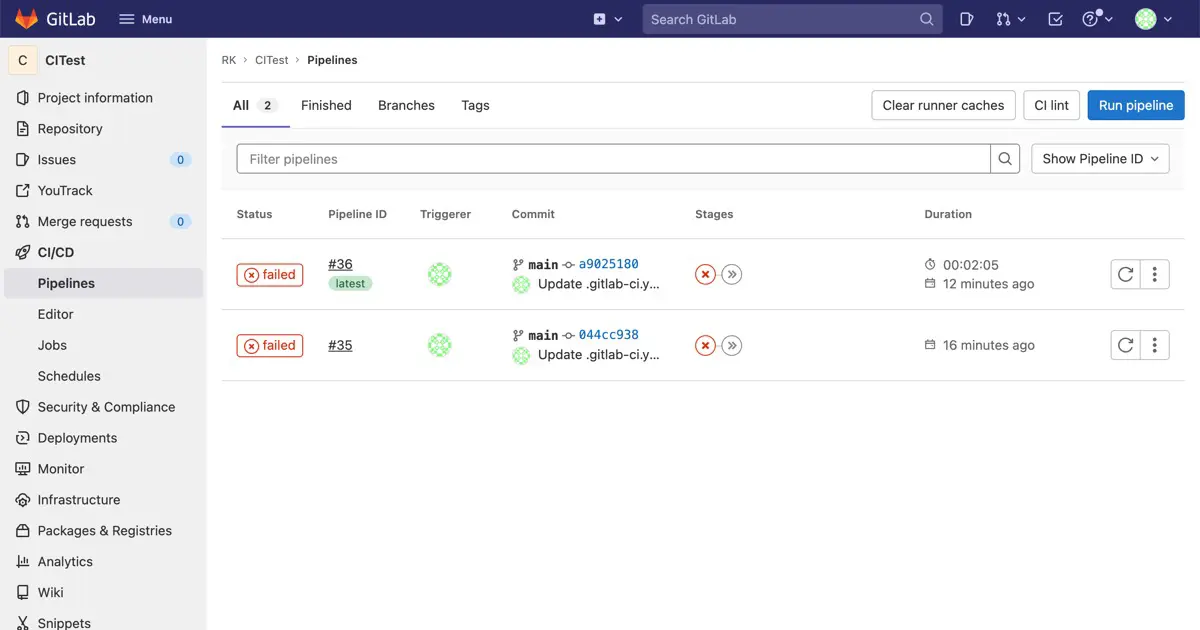
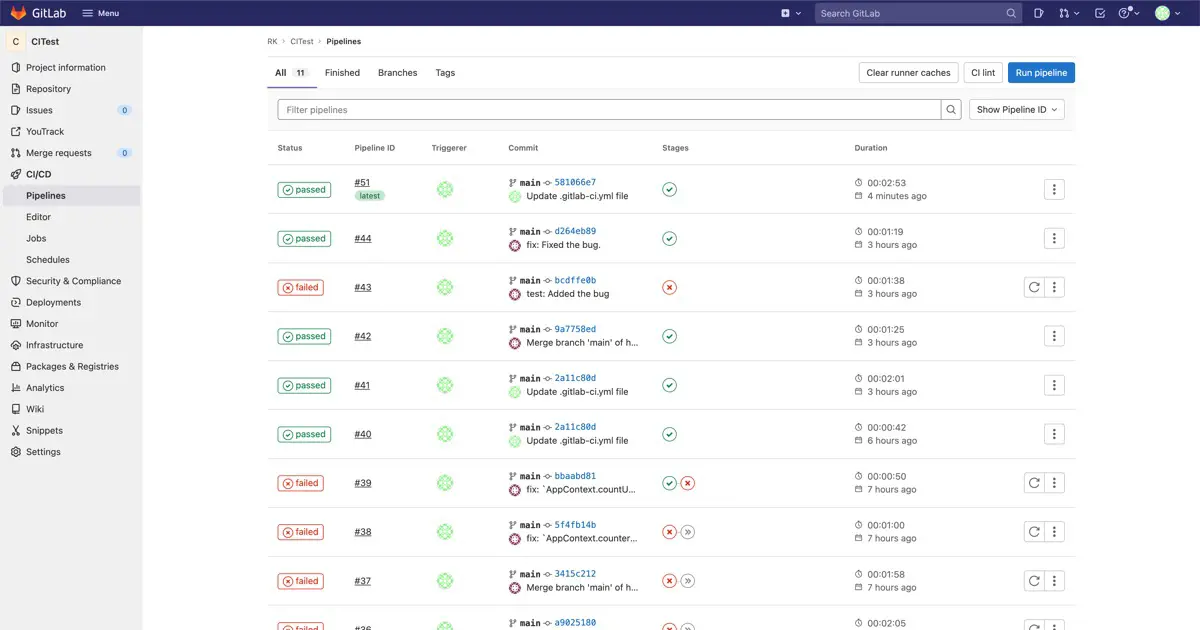
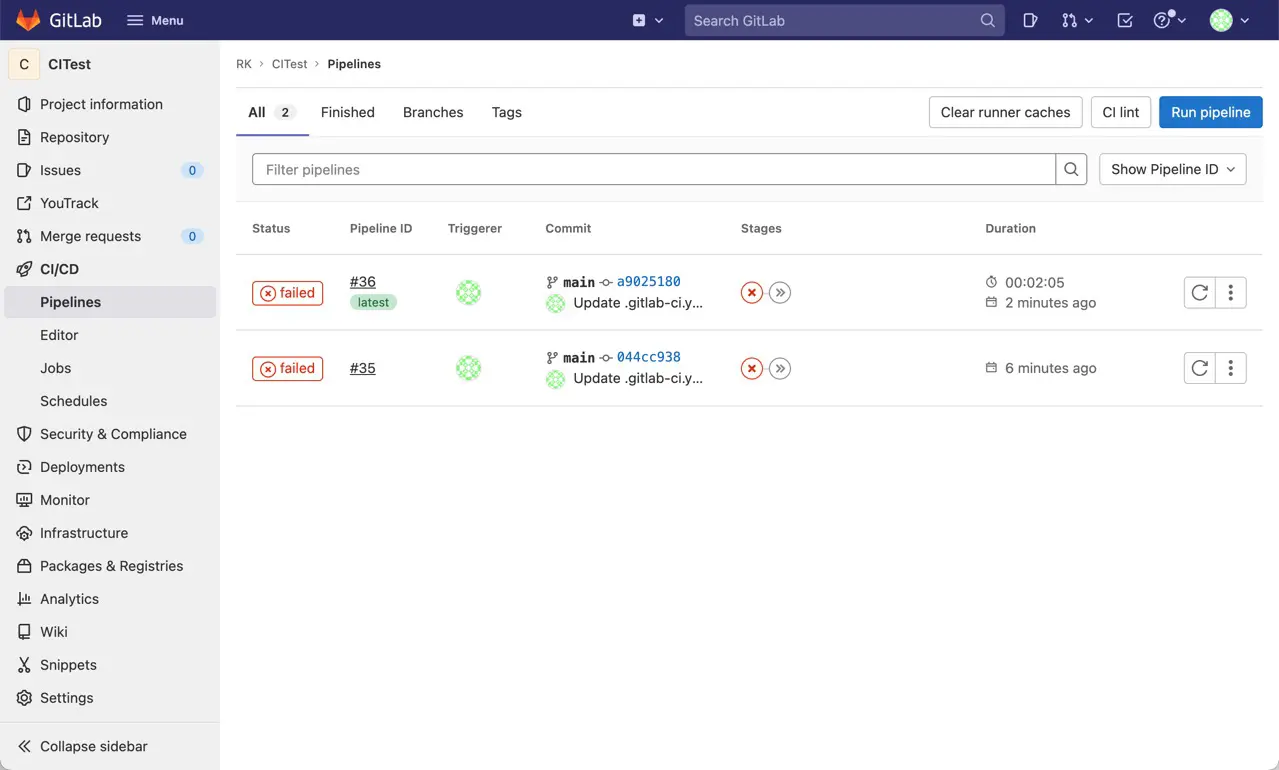
Push the created test code to the repository. Since this is a must-fail test, the job will fail after a while, and you will receive an error notification email.
Open the Pipelines of the CI/CD of the project. You can see failed jobs. Click on FAILED.
Open the Failed Jobs tab. If the error is due to test failure as planned, the test case (method) name of the failed test is output as follows.
2022-06-27 18:59:30.903 xcodebuild[18902:109049] [MT] IDETestOperationsObserverDebug: 0.000 sec, +0.000 sec -- start
2022-06-27 18:59:30.903 xcodebuild[18902:109049] [MT] IDETestOperationsObserverDebug: 104.154 sec, +104.154 sec -- end
Failing tests:
	CITestTests:
		CITestTests.testExample()

** TEST FAILED **

ERROR: Job failed: exit status 1
If you are getting other errors, please review the logs and settings.
About the UI testing
Here we have only unit testing with XCTest, but it is no different for UI testing.
Suppose the UI Testing test package is included in the Xcode project and registered in the scheme’s test plan. In that case, UI testing will be performed automatically, just as when testing manually from Xcode.
Troubleshooting
I will post the errors I encountered when I set it up and how to handle them.
Only works when the user is logged in
XCTest must be run by the logged-in current user. Therefore, the Mac running the Runner must be logged in.
When the machine is rebooted
If you follow the official installation procedure, it will be registered as a service, so when you reboot your machine, all you have to do is log in, and Runner will start.
Status remains pending
The status is still pending, and the pipeline build_project shows an error that the Runner corresponding to the tag does not exist.
In this case, the following are possible causes.
- The
tagis incorrect. - Try to use
Shared Runner, butShared Runneris not enabled in your project. - Runner on Mac is not running in user mode.
2 see “Activate Shared Runner” on this page.
I’m stuck on 3. When registering Runner, the command line output by GitLab has sudo on it, and if I run it as is, Runner won’t work in user mode, so that XCTest won’t work either.
Simulator name or OS version is incorrect.
In this case, the following error is output in the build_project log, which lists the available simulator and OS combinations.
xcodebuild: error: Unable to find a destination matching the provided destination specifier:Correct the values you specify in the .gitlab-ci.yml file to the appropriate values.
Open the Editor of your project’s CI/CD to edit and commit the .gitlab-ci.yml file from within your web browser.
For information on how to specify the simulator name and OS version, see the following article.


