OpenCV is an open-source image processing and machine learning library. Its highly functional library allows you to develop applications more efficiently than implementing all image processing and machine learning processes from scratch.
Not only is it highly functional, but it is also speedy. Internally, OpenCL, SIMD, IPP (Intel Performance Primitive), and threaded parallelization are used to achieve speeds that cannot be obtained with ordinary, straightforward implementation.
This article describes how to set up an OpenCV development environment to develop iOS applications using OpenCV.
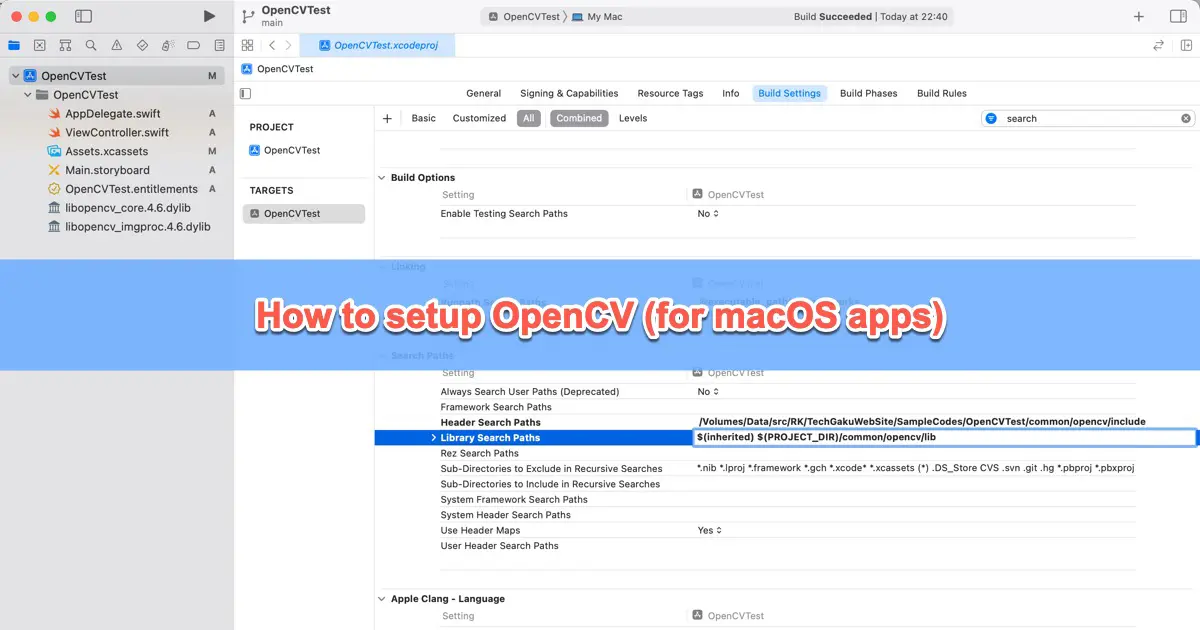
For more information on how to set up a development environment for macOS applications, see the following article.
Xcode project settings
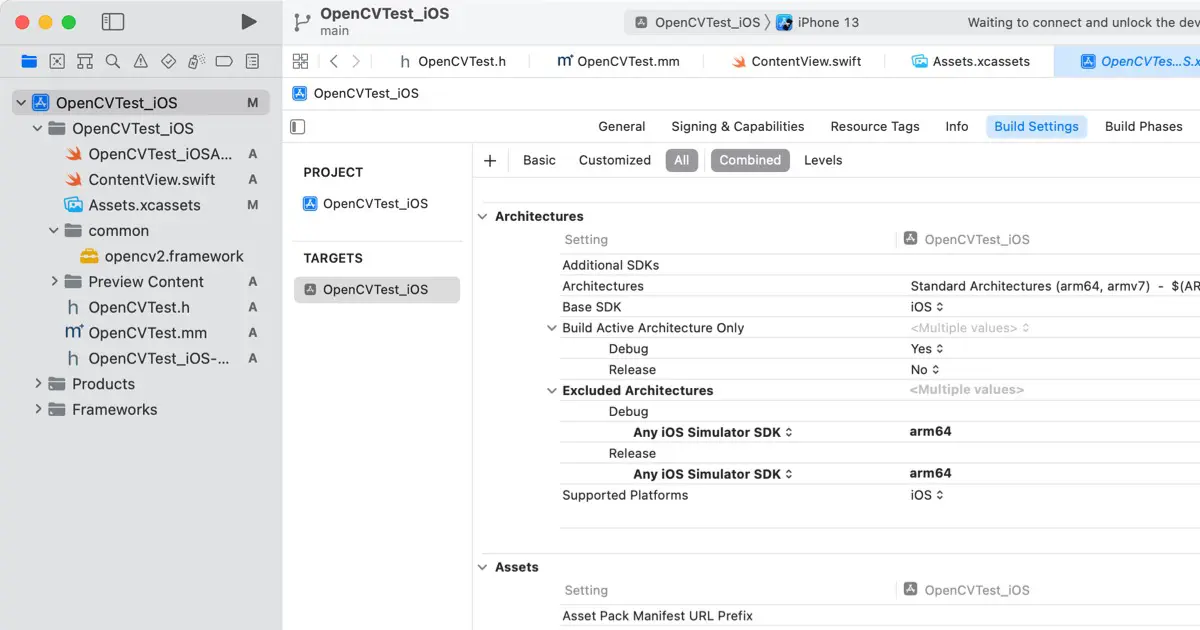
To use OpenCV in your app, embed the downloaded framework. Set up your project as follows.
Download SDK
The iOS version of the SDK is available as a pre-built framework on GitHub’s Release page. Download this.

Copy the framework
The opencv2.framework you downloaded includes header files. Arrange these into the following folder structure.
OpenCVTest_iOS
├── OpenCVTest_iOS
│   ├── Assets.xcassets
│   ├── ContentView.swift
│   ├── OpenCVTest_iOSApp.swift
│   └── Preview Content
├── OpenCVTest_iOS.xcodeproj
│   ├── project.pbxproj
│   ├── project.xcworkspace
│   └── xcuserdata
└── common
    └── opencv2.framework
Add the framework
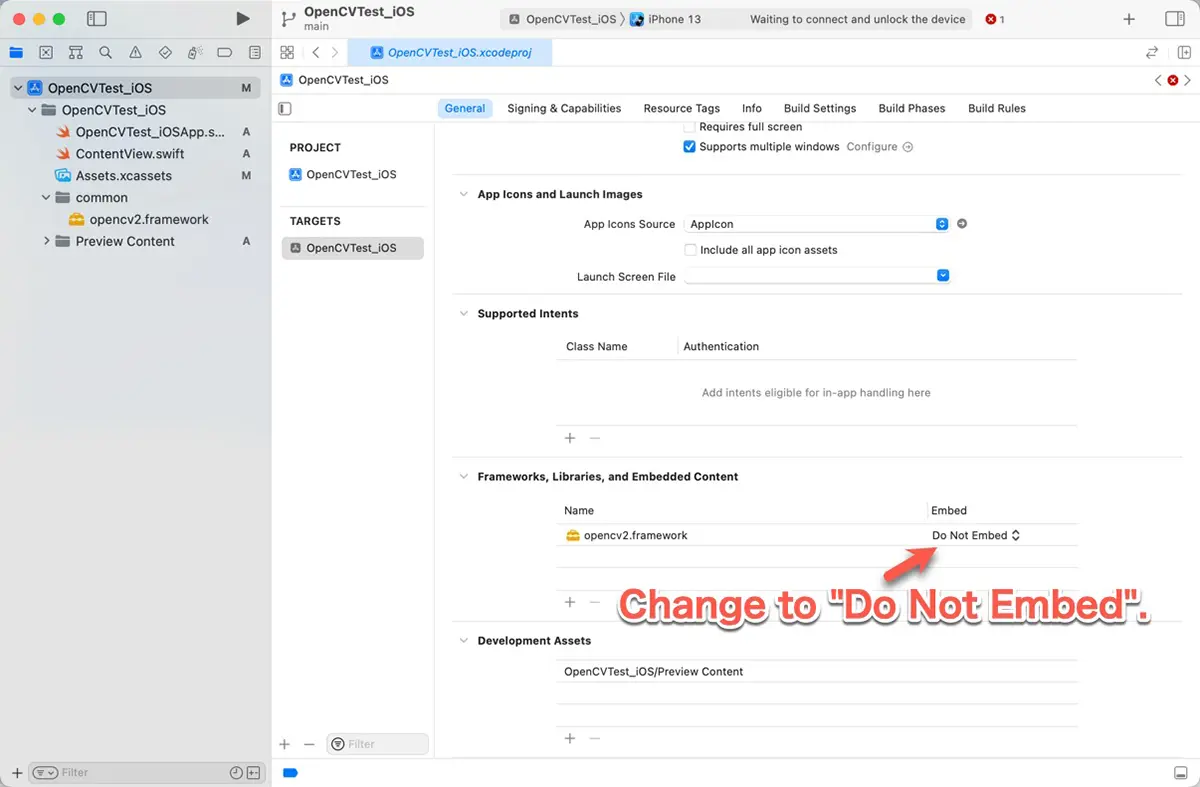
Add the opencv2.framework to your project. Operate as follows.

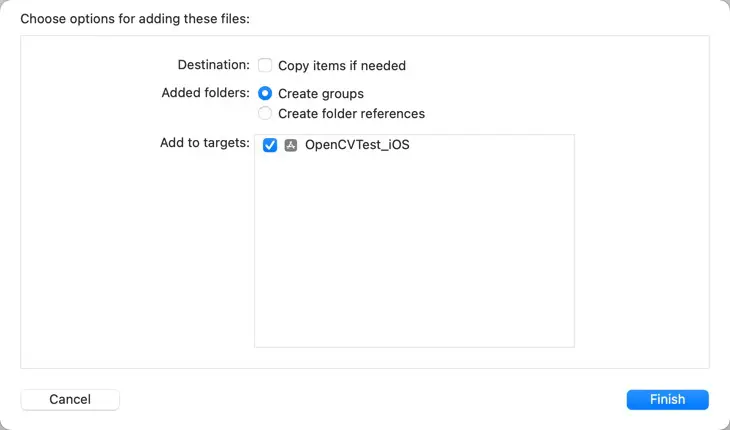
Configure framework embedding
Operate as follows.
Error regarding the binary type
The following error may appear. In our case, this occurred with Xcode 13.4.1 + OpenCV 4.6.
Buidling for iOS Simulator, but the linked and embedded framework 'opencv2.framework' was built for iOS + iOS Simulator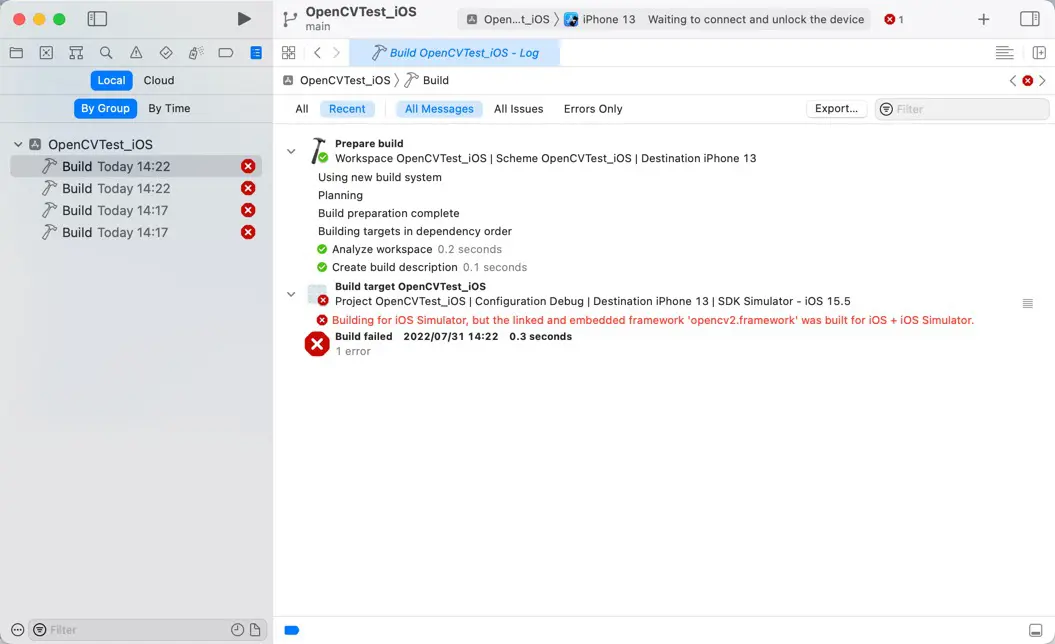
The error message indicates that opencv2.framework encompasses two binaries – one for the iOS device and the other for the iOS simulator – and the app targets the iOS simulator. Initially, I did not perceive this as an issue.
This may seem like a bug in Xcode, but you can work around it by doing the following.
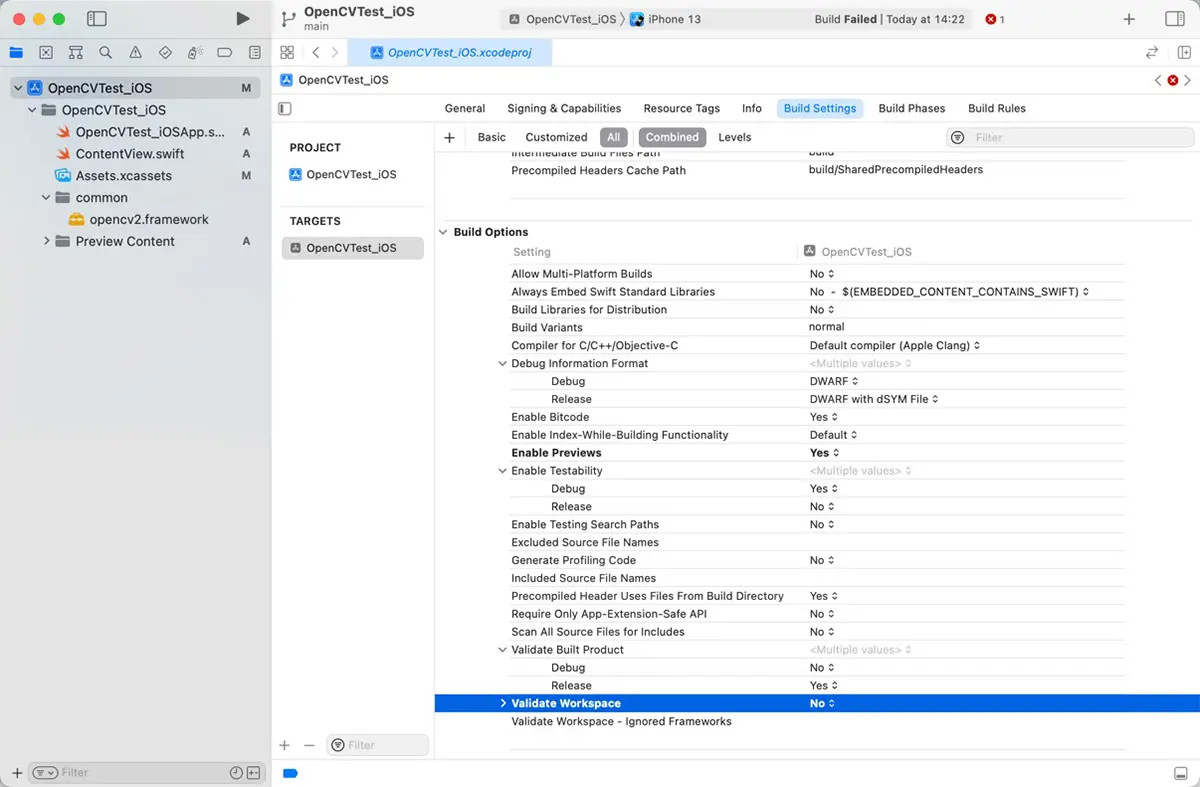
This error appears to be an error that occurs when “Validate Workspace” is YES. However, it was initially displayed as “NO”, meaning it would be “NO” when nothing was set. (not bolded)
Changing it once and then reverting it will explicitly set it to specify “NO”.
This is an expectation, but Xcode assumes that the default setting is “NO”, but the linker’s default value may be “YES”.
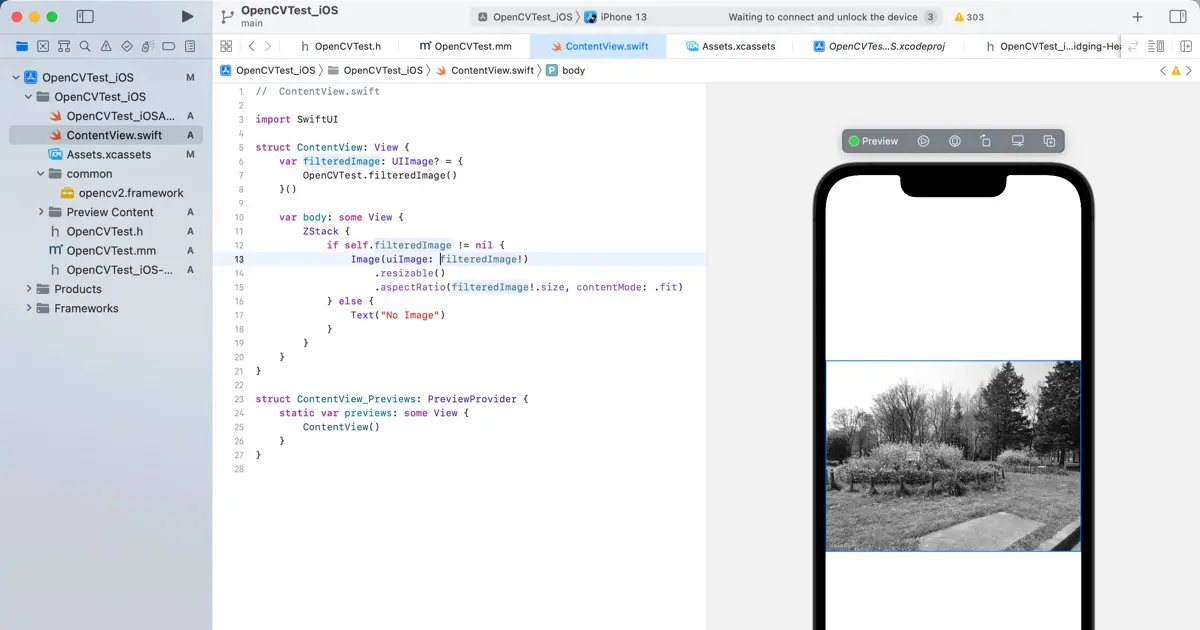
Test
Let’s try the following simple code to see if OpenCV works: OpenCV is C++, so we write it in Objective-C++ and call it from Swift. The image to be used is embedded in a resource, so it is loaded with UIImage.
// OpenCVTest.h

#import <UIKit/UIKit.h>

@interface OpenCVTest : NSObject
+ (nullable UIImage *)filteredImage;
@end
// OpenCVTest.mm
#import "opencv2/opencv.hpp"
#import "opencv2/imgproc.hpp"
#import "opencv2/imgcodecs.hpp"
#import "opencv2/imgcodecs/ios.h"
#import "OpenCVTest.h"
@implementation OpenCVTest
+ (nullable UIImage *)filteredImage
{
UIImage *srcImage = [UIImage imageNamed:@"P4071145"];
cv::Mat srcImageMat;
cv::Mat dstImageMat;
// Convert from UIImage to cv::Mat
UIImageToMat(srcImage, srcImageMat);
// Convert the color space from RGB to Gray
cv::cvtColor(srcImageMat, dstImageMat, cv::COLOR_RGB2GRAY);
// Convert from cv::Mat to UIImage
UIImage *dstImage = MatToUIImage(dstImageMat);
return dstImage;
}
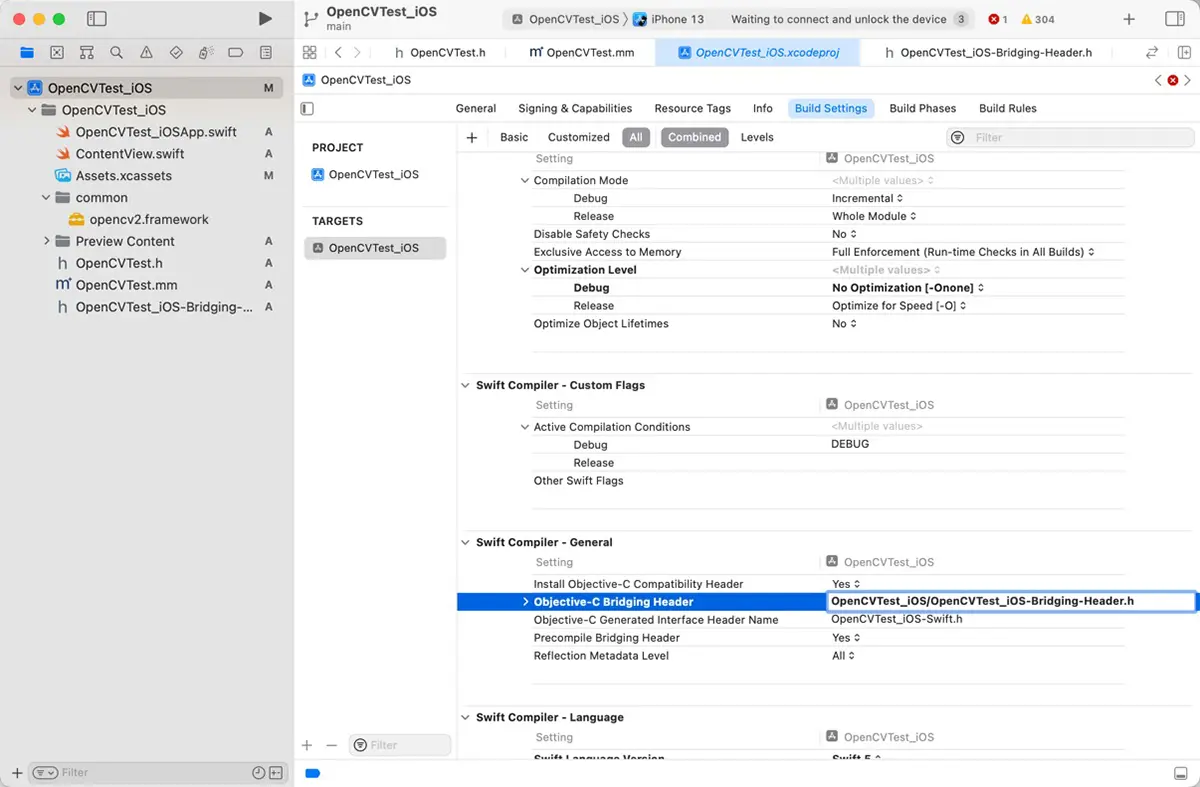
@endInclude OpenCVTest.h in a bridging header to use Objective-C++ classes from the Swift code. The bridging header is created with the name ProjectName-Bridging-Header.h. In this project, it is OpenCVTest_iOS-Bridging-Header.h. Write the following code in the bridging header.
#import "OpenCVTest.h"The bridging header is specified in the Objective-C Briding Header under Swift Compiler - General in the target build settings.
Next, invoke it from the Swift code. We executed this procedure using SwiftUI. Here is the corresponding code:
//  ContentView.swift

import SwiftUI

struct ContentView: View {
    var filteredImage: UIImage? = {
        OpenCVTest.filteredImage()
    }()

    var body: some View {
        ZStack {
            if self.filteredImage != nil {
                Image(uiImage: filteredImage!)
                    .resizable()
                    .aspectRatio(filteredImage!.size, contentMode: .fit)
            } else {
                Text("No Image")
            }
        }
    }
}

struct ContentView_Previews: PreviewProvider {
    static var previews: some View {
        ContentView()
    }
}
Test on the device
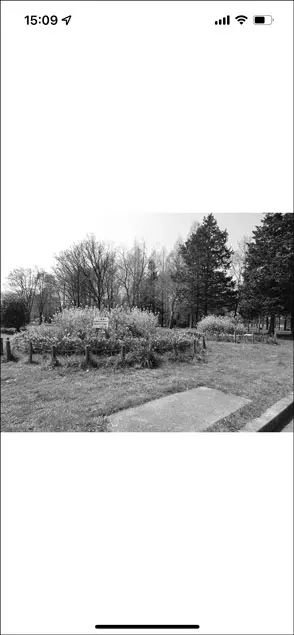
Let’s run it on a real device. The following screen capture is when run on an iPhone 13 Pro. It is nicely grayscaled.
Running results on the simulator and preview
When we tried to run the simulator with a pre-built binary of OpenCV 4.6.0, we got the following error.
ld: in /Volumes/Data/src/RK/TechGakuWebSite/SampleCodes/OpenCVTest_iOS/common/opencv2.framework/opencv2(ios_conversions.o), building for iOS Simulator, but linking in object file built for iOS, for architecture arm64
clang: error: linker command failed with exit code 1 (use -v to see invocation)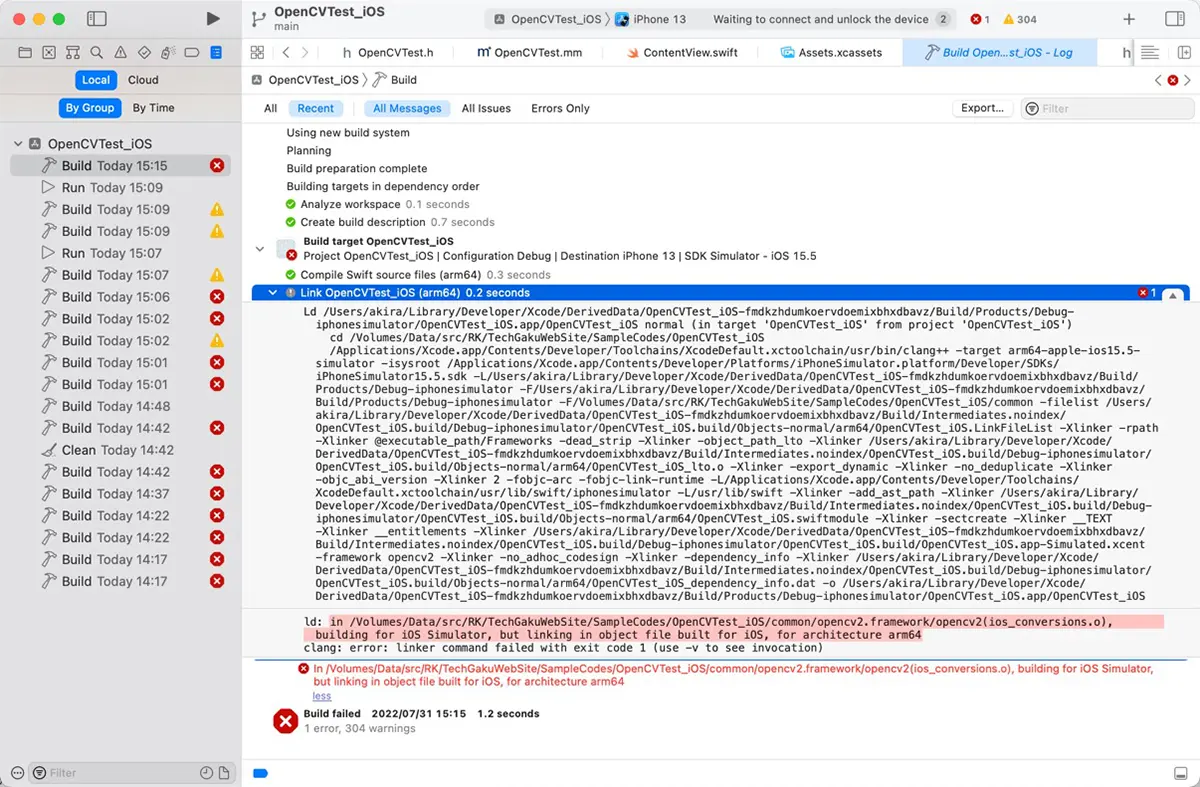
This error emerges when you are building for an iOS simulator but linking to an iOS device. For Apple Silicon machines such as the M1, the binary is arm64. Therefore, the build for the simulator also uses the arm64 version, i.e., for iOS devices, so it is an error.
It works by changing the binary for the iOS simulator to x86_64. The simulator on the Apple Silicon machine also supports the x86_64 binary by Rosetta2.
See the following article.