


Homebrew v2.0, released on February 2, 2019, added support for Windows 10(WSL) and Linux.
This article explains how to set up WSL, which Homebrew needs.
Install WSL on Windows 10
Follow these steps to install.
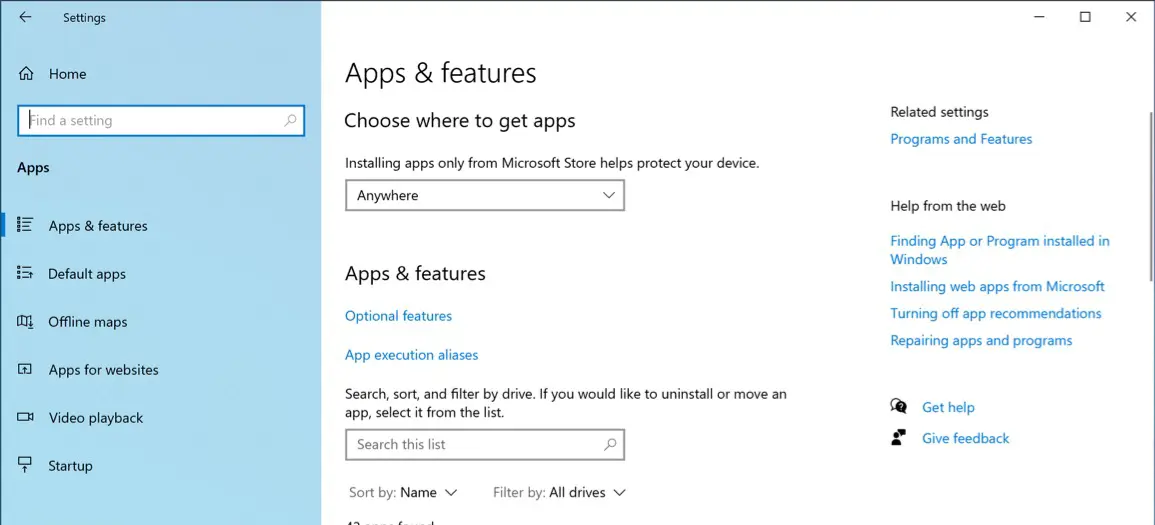
(1) Select “Settings” from the Start menu.
(2) Click “Apps”.
(3) Click “Programs and Features”.
Finding this option can be tricky; it’s under the “Related settings” section. In the screenshot, it appears in the upper right corner. However, if the window is narrow, it may be positioned below the list of installed apps.
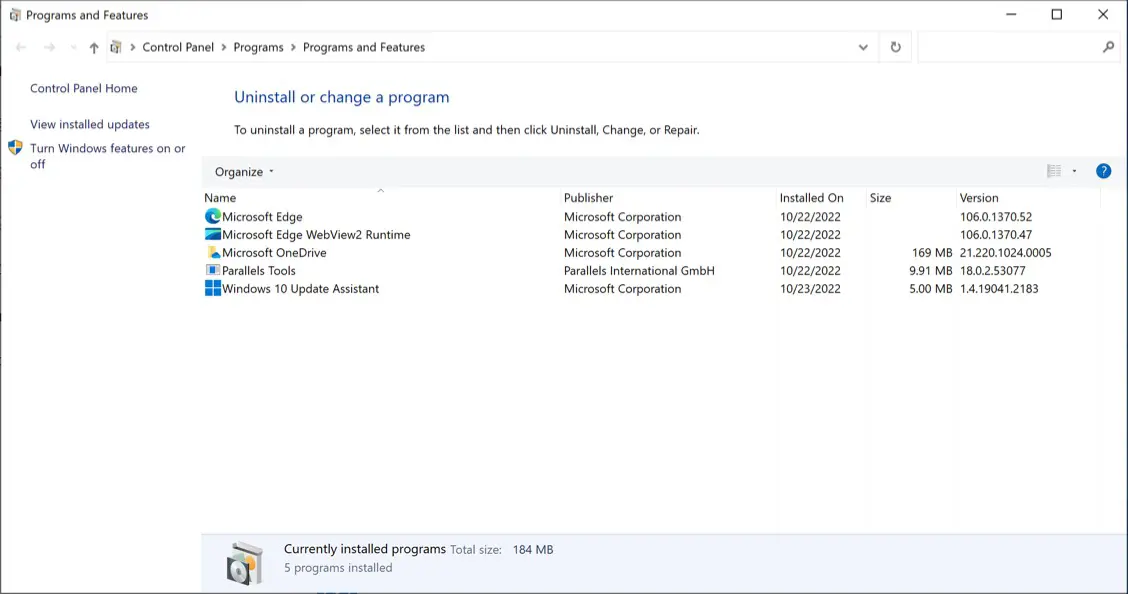
(4) Click “Turn Windows features on or off”. It appears among the links lined up on the window’s left side.
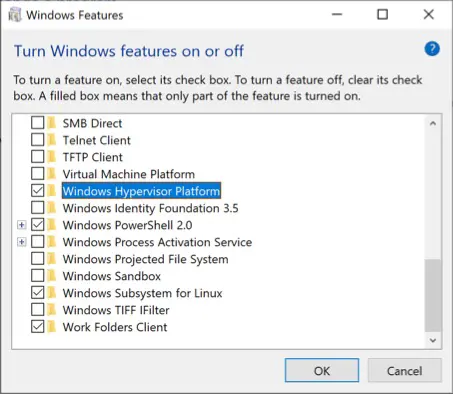
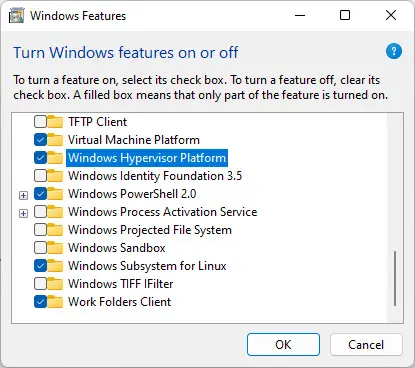
(5) Turn on “Windows Subsystem for Linux” and “Windows Hypervisor Platform” (or “Hyper-V”) and click the “OK” button.
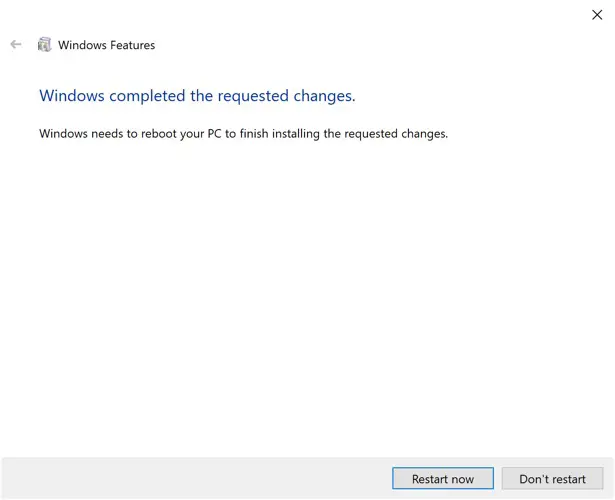
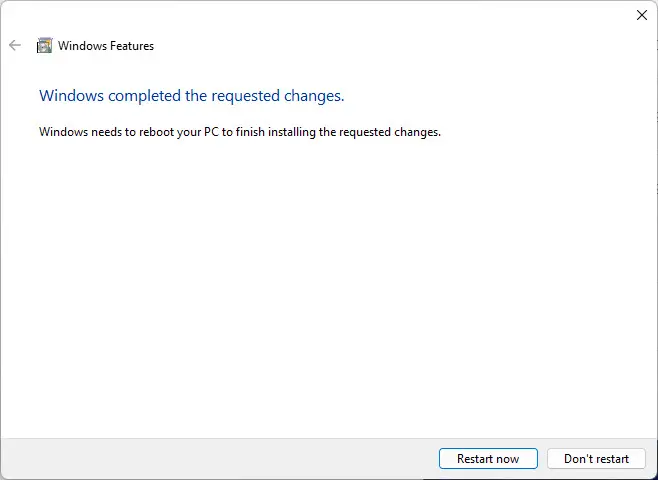
(6) The installation will begin. When the installation is complete, the message “Windows completed the requested changes.” is displayed. Click the “Restart now” button.
Install WSL on Windows 10
Follow these steps to install.
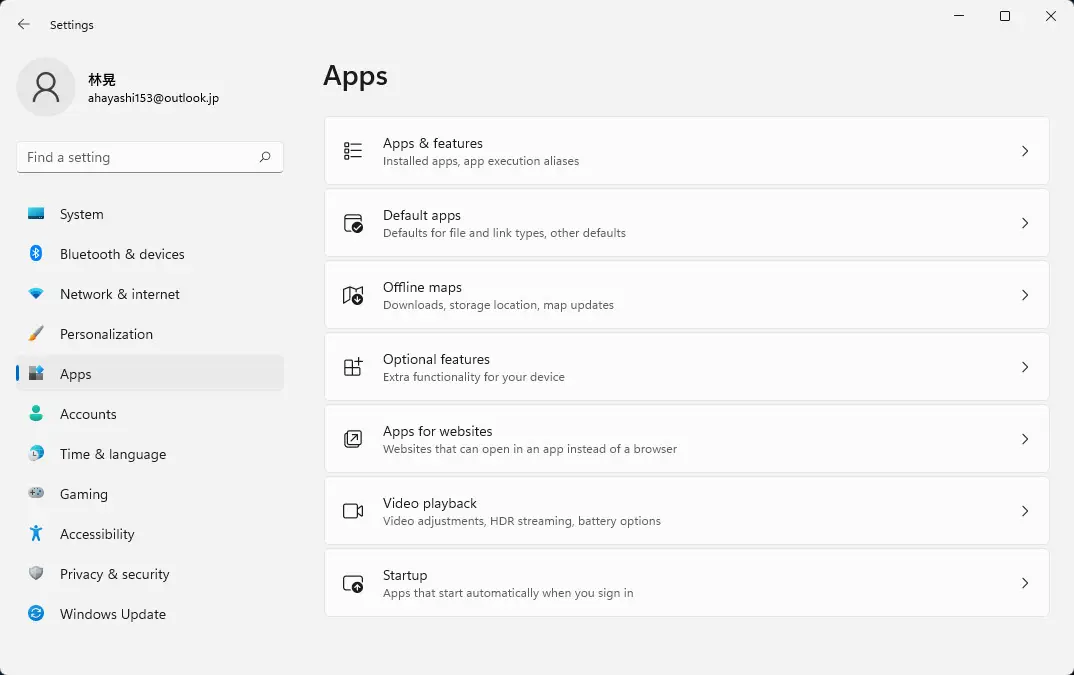
(1) Click the “Start” button and click the “Settings”.
(2) Click the “Apps”.
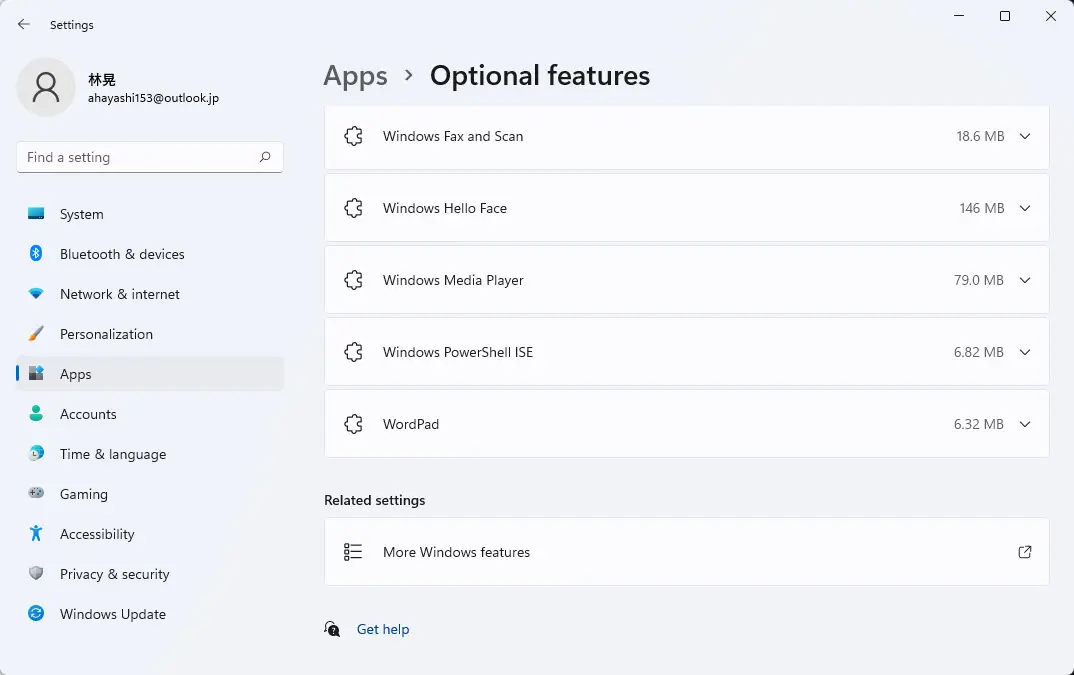
(3) Click the “Optional features”.
(4) Scroll down to the bottom, and click “More Windows features” in the “Related settings” section.
(5) Turn on “Windows Subsystem for Linux” and ” Windows Hypervisor Platform”, and click the “OK” button.
(6) The installation will begin. When the installation is complete, the message “Windows completed the requested changes.” is displayed. Click the “Restart now” button.
Install the Linux distribution
Next, install the Linux distribution to run with WSL, which you can install from the Microsoft Store.
To use Homebrew, you can use any distribution. I chose to install Ubuntu because I am familiar with it.
Do following.
On Windows 10
The display changes slightly between Windows 10 and 11, but the operating procedure is the same.
(1) Search for “Ubuntu” in the Microsoft Store application.
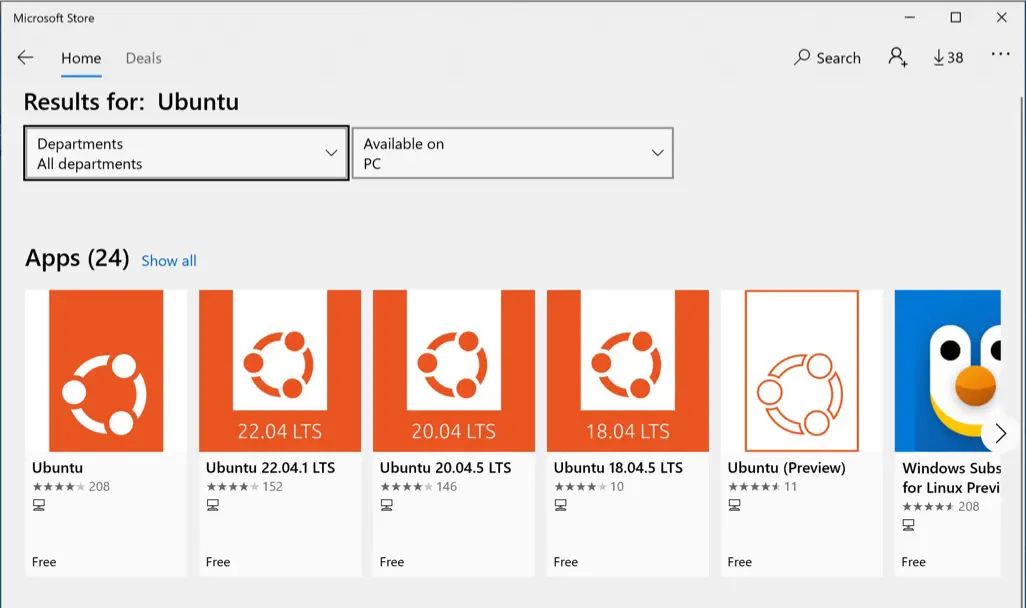
(2) Click the “Ubuntu”. (Free at the time of this writing)
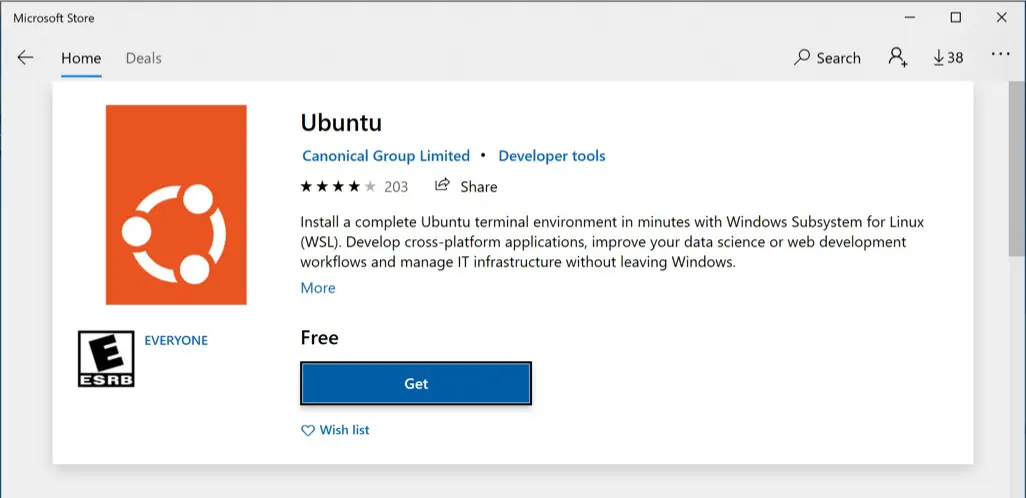
(3) Click the “Get” button or the “Install” button.
If you have installed the software in the past, the “Install” button will appear; otherwise, the “Get” button will appear.
(4) Click the “Launch” button. If you select “Pin to Start” in the notification when the installation is complete, you can start the program from Start.
On Windows 11
The display changes slightly between Windows 10 and 11, but the operating procedure is the same.
(1) Search for “Ubuntu” in the Microsoft Store Application.
(2) Click the “Get” button or the “Install” button.
If you have installed the software in the past, the “Install” button will appear; otherwise, the “Get” button will appear.

Setup Ubuntu
When Ubuntu is started, a shell is launched. So the first time you start Ubuntu, you must set up the Ubuntu side. Follow the steps below to set it up.
(1) The installation process is executed. Continue to wait.
Depending on the version of Ubuntu, the shell may display the following, or the GUI may display progress.
Installing, this may take a few minutes...
At this point, an error message may appear. Please open the page that is displayed its URL with the error message, follow the instruction to solve the problem, and then start the program again. The error screen can be closed by pressing any key.
Please refer to the section later in this article that describes the error in my environment.
(2) After a few moments, the following will appear, and you will be asked to wait for a user name to be entered to create a UNIX user account. Enter any user name.
Please create a default UNIX user account. The username does not need to match your Windows username.
For more information visit: https://aka.ms/wslusers
Enter new UNIX username:
(3) Enter the password of the new account.
Enter new UNIX password:
Retype new UNIX password:
Now, you can use Ubuntu on WSL.
Update the kernel component
The following error may be displayed.
WslRegisterDistribution failed with error: 0x800701bc
Error: 0x800701bc WSL 2 ???????? ?????????????? https://aka.ms/wsl2kernel ????

Press any key to continue...
This error is displayed when the kernel component is too old. You need to download the latest kernel component from https://aka.ms/wsl2kernel and install it. Do as follows.
(1) Open https://aka.ms/wsl2kernel .

(2) Download the “WSL2 Linux kernel update package for x64 machines”.
If you use not x64 machines such as ARM64, follow to the web page and download appropriate package.
(3) Open the downloaded package. The wizard is displayed. Click the “Next” button.
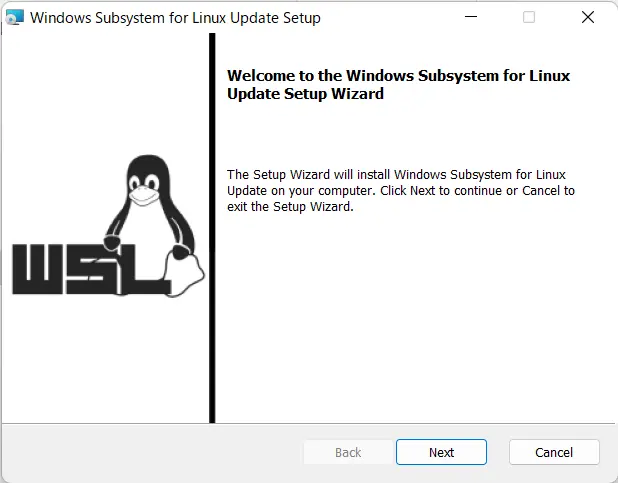
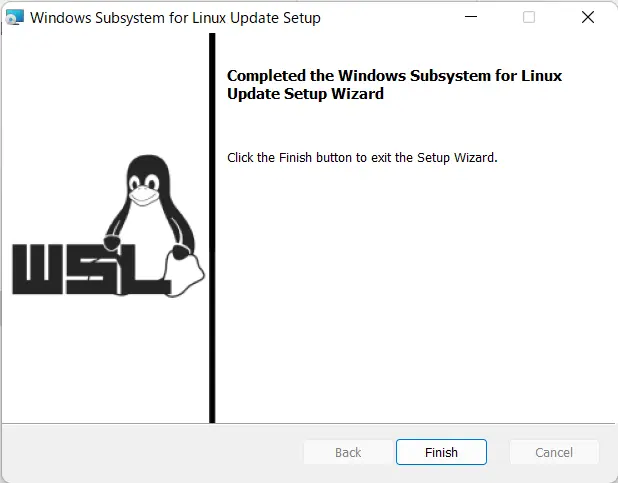
(4) The installation will begin. Follow the instructions of the wizard. When the completion screen appears, click the “Finish” button.
When virtualization support functions need to be enabled in the BIOS/UEFI
When the virtualization support is disabled in the BIOS or UEFI, the following error is displayed.
WslRegisterDistribution failed with error: 0x80370102
Please enable the Virtual Machine Platform Windows feature and ensure virtualization is enabled in the BIOS.
For information please visit https://aka.ms/enablevirtualization
(1) Enable the virtualization function in the BIOS or UEFI.
Please see your machine’s manual. For example, in the case of my Dell machine, you will find the following items in the BIOS menu.
- Enable Intel Virtualization Technology
- Enable VT for Direct I/O
(2) Launch the PowerShell with the administrator rights.
(3) Run the following in PowerShell to check the Hypervisor is enabled.
bcdedit /enum | findstr -i hypervisorlaunchtypeWhen the Hypervisor is disabled, the following message will be displayed.
hypervisorlaunchtype OffRun the following to enable the Hypervisor.
bcdedit /set {current} hypervisorlaunchtype AutoThe needed components may not be installed if any message is not displayed. So, first, run the following to check whether your machine supports Hypervisor.
systeminfo.exeA lot of information is displayed. Check the Hyper-V Requirements. If the output is as follows, the machine is Hyper-V compliant.
Hyper-V Requirements: VM Monitor Mode Extensions: Yes
                      Virtualization Enabled In Firmware: Yes
                      Second Level Address Translation: Yes
                      Data Execution Prevention Available: Yes
If you are getting an error in this situation, Hyper-V is most likely not installed. Instead, follow the WSL installation instructions in this article to install “Hyper-V” or “Windows Hypervisor Platform”.
If the output is as follows, the Hyper-V is already enabled.
Hyper-V Requirements: A hypervisor has been detected. Features required for Hyper-V will not displayed.


